
Hexo webhook 自动部署
Hexo 是什么?
Hexo 是一个快速、简洁且高效的博客框架。 Hexo 使用 Markdown(或其他标记语言)解析文章,在几秒内,即可利用靓丽的主题生成静态网页。
本文对应的环境:
- 一台公网服务器
- 有 Git 平台托管 hexo 生成的站点(Github 或自建 Git 仓库)
- 本地能运行 Hexo
若你没有公网服务器,那么可以忽略本文 服务器配置 部分,转而采用类似 Github page 等其他平台的服务。但是 本地配置 部分是相同。
本文采取的建站方案:
- 本地编写文章,编写好后通过 hexo 构建站点,并将站点通过 git push 到 github 仓库。当 push 结束后, github 通过 webhook 向我的公网服务器发送提示,我的公网服务器收到提示后自动 clone 站点到 nginx 反向代理的站点目录。
公网服务器端通过
neurocoda/gitrigger:latest容器自动化完成接收 webhook 提示, git clone 工作。
Git 平台配置
创建一个代码仓库。
本地配置
安装 Nodejs
各种系统的安装方式详见:https://hexo.io/zh-cn/docs/
我本地是 Ubuntu:
根据: https://github.com/nodesource/distributions
1 | curl -fsSL https://deb.nodesource.com/setup_23.x -o nodesource_setup.sh |
验证安装:
1 | node -v |
安装 Hexo-cli
1 | npm install -g hexo-cli |
建立 Hexo 仓库
1 | hexo init <folder> |
配置 Git
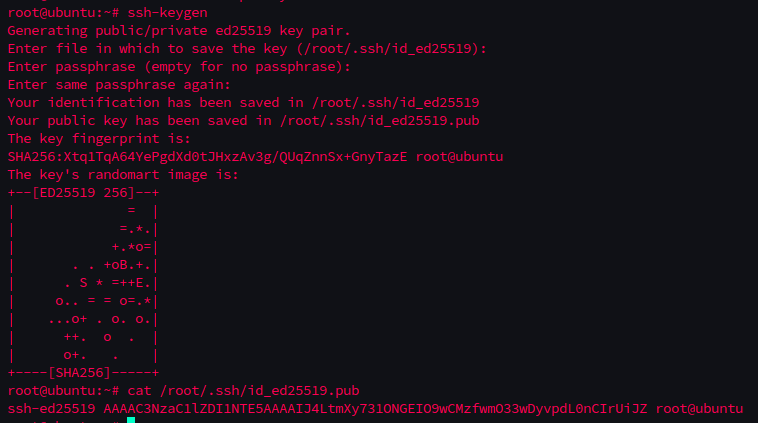
创建 ssh key:
1 | ssh-keygen |
获取公钥:
1 | cat /root/.ssh/id_ed25519.pub |
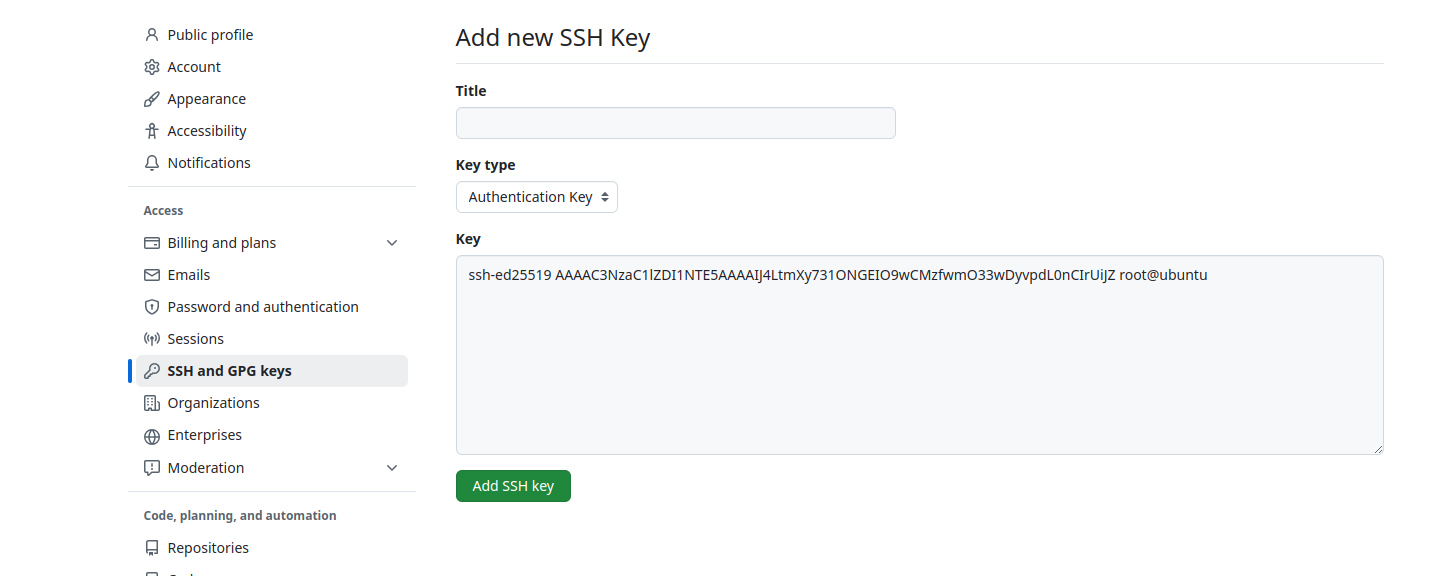
将获取到的公钥添加到你选择的 git 平台
Github: https://github.com/settings/keys
Hexo 添加 Git
在 Hexo 根目录下:
安装插件:
1 | npm install hexo-deployer-git --save |
1 | vim _config.yml |
在底部找到,并添加仓库信息:
1 | # Deployment |
服务器配置
防火墙配置
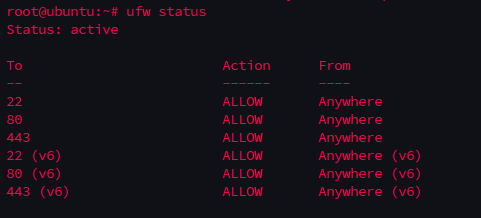
开放防火墙:
1 | ufw allow 22 |
启用并查看防火墙状态:
1 | ufw enable |
安装 Nginx, Docker
更新源:
1 | apt update |
安装 docker-compose, nginx, python3-certbot-nginx:
1 | apt install docker-compose nginx certbot python3-certbot-nginx |
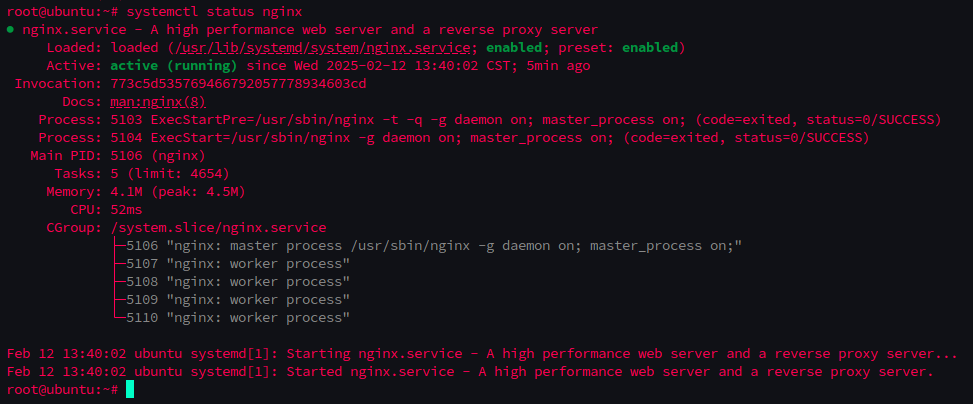
确定 nginx 已经正确运行了:
1 | systemctl status nginx |
配置 SSH 密钥
如果你的仓库是私有仓库,那么需要配置 ssh 密钥:
创建 ssh key:
1 | ssh-keygen |
获取公钥:
1 | cat /root/.ssh/id_ed25519.pub |
将获取到的公钥添加到你选择的 git 平台
Github: https://github.com/settings/keys
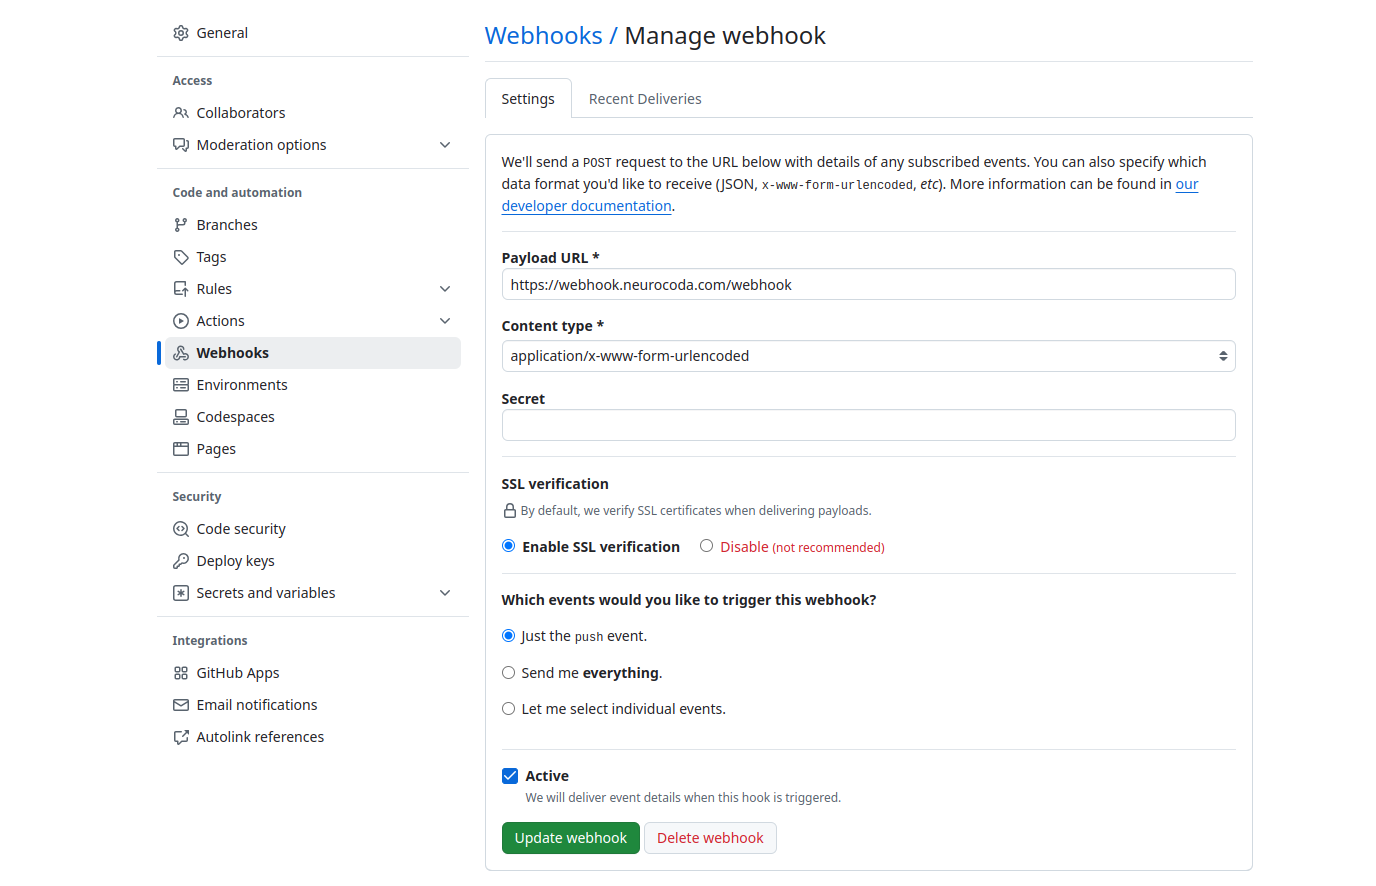
配置 Webhook
在仓库配置 webhook:
服务启动
编写 docker-compose.yml:
1 | vim docker-compose.yml |
填入以下内容:
1 | version: '3.8' |
在 docker-compose.yml 所在目录执行 up 指令:
1 | docker-compose up -d |
查看容器状态:
1 | docker ps -a |

状态为 Up 意为容器正确运行。(这里我还有其他服务,所以看起来可能不一样)
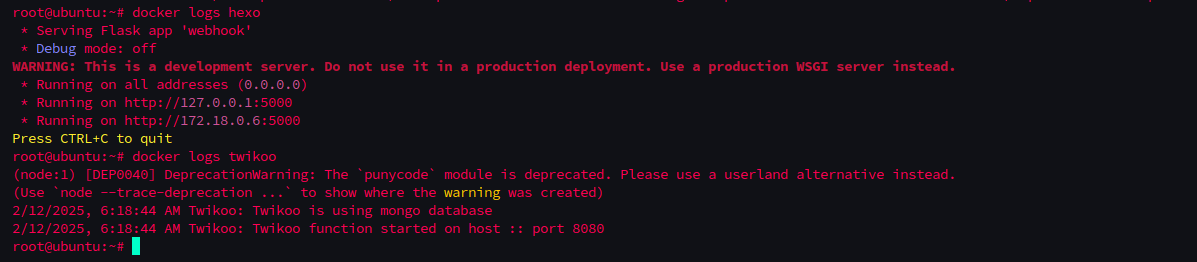
查看容器日志:
1 | docker logs hexo |
配置反向代理
编辑 nginx.conf:
1 | vim /etc/nginx/nginx.conf |
添加反向代理:
1 | user www-data; |
修改好配置之后检查语法是否错误:
1 | nginx -t |

重载 nginx 配置:
1 | systemctl reload nginx |
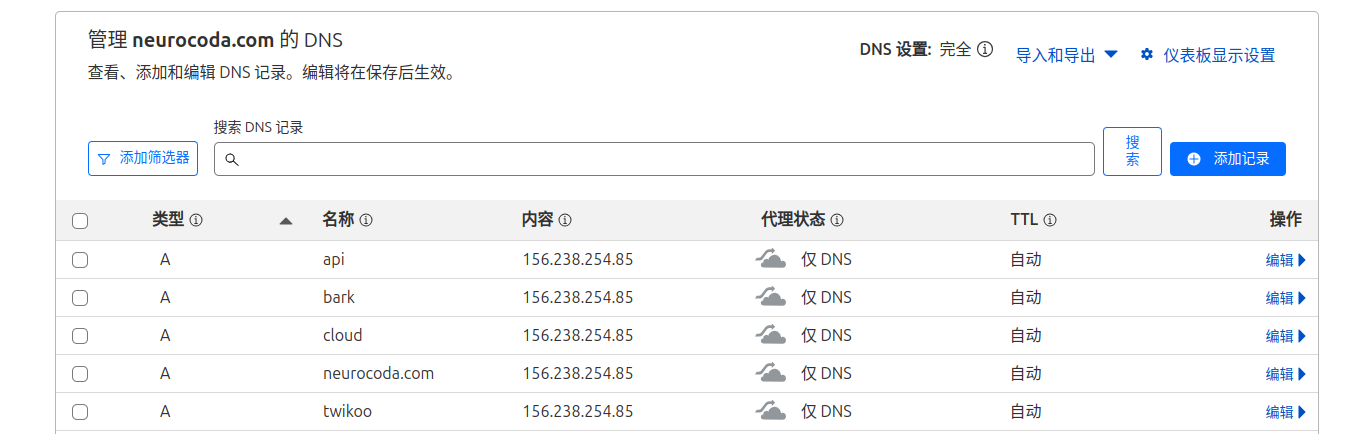
确定已正确配置 DNS 记录:
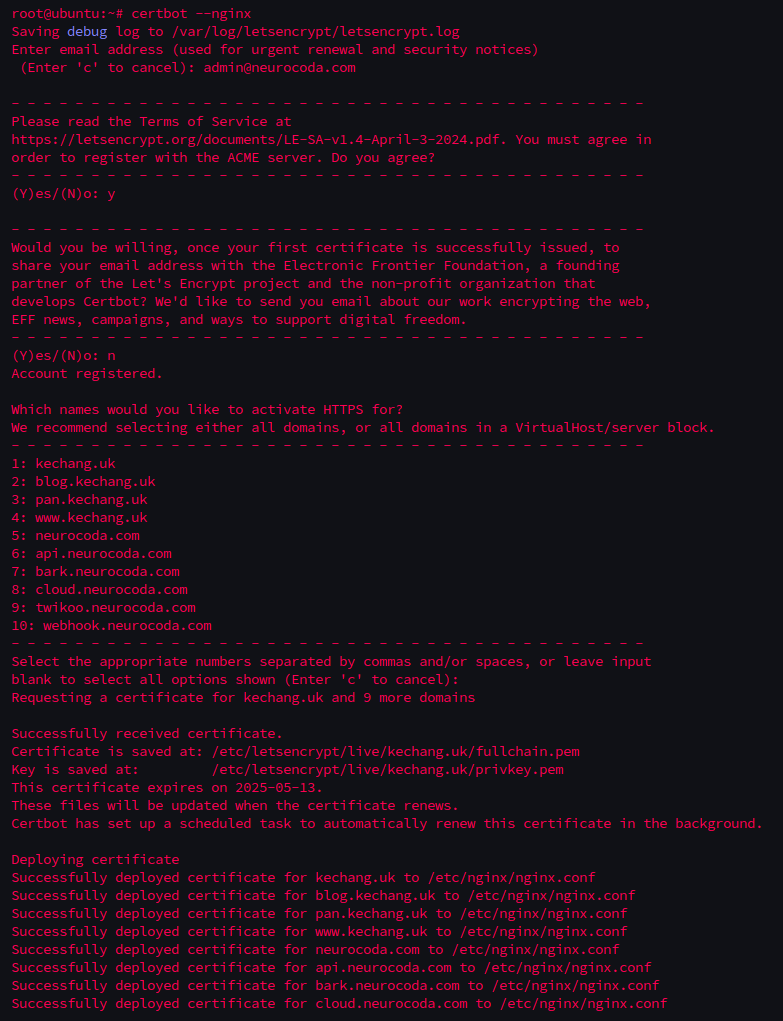
配置 SSL
配置 SSL:
1 | certbot --nginx |
按照要求填入信息
检查 certbot 修改后的 nginx.conf 语法是否正确:
1 | nginx -t |
重载 nginx 配置
1 | systemctl reload nginx |
同步测试
在你的本地的 Hexo 的目录:
1 | hexo clean & hexo g & hexo d |
等待执行完成后访问你的服务器,不出意外的话,网页已经展示出来了。
常见问题
权限问题
1 | chmod 755 /var/www/sites/Hexo |
- Title: Hexo webhook 自动部署
- Author: Neurocoda
- Created at : 2025-02-13 17:01:33
- Updated at : 2025-02-13 17:01:33
- Link: https://neurocoda.com/p/2cc1110b.html
- License: This work is licensed under CC BY-ND 4.0.


