Xiaomi Camera No NAS Solution
Idea
Use Rclone and OpenList’s WebDAV API to mount 123Pan (or other cloud drives supported by OpenList) to a local directory, then share that directory via Samba; the Xiaomi CW500 camera and OpenWrt are on the same LAN, and the Xiaomi camera connects to the Samba share on OpenWrt via the Samba protocol to upload surveillance videos.
This solution is suitable for users who do not have a suitable NAS but do not want to purchase cloud storage services for monitoring.
Device Information
OpenWrt
| Model | Octopus Planet (Zhangyu Planet S912) |
| Architecture | AArch64 Processor : Cortex-A53 * 8 (Arm64) |
| Firmware Version | OpenWrt R2024.11.05 / LuCI Master (git-24.283.20555-a1e6216) |
| Kernel Version | 6.1.114-flippy-92+o |
Docker
| Docker Version | 27.2.0 |
REPOSITORY TAG IMAGE ID CREATED SIZEopenlistteam/openlist latest 6c11957205f7 2 weeks ago 136MBXiaomi CW500 Camera
NAS transfer function: Supported (requires a memory card)
NAS protocol: SMB1.0/SMB2.0
Currently only supports NAS transfer within LAN (as of 2025-07-26)
Prerequisites
Obtain the API key pair for 123Pan
https://www.123pan.com/developer
OpenList Configuration
Deploy OpenList
Create docker-compose.yml
vim docker-compose.ymlFill in the following content
version: '3.8'
services:  alist:    image: openlistteam/openlist:latest    container_name: openlist    restart: unless-stopped    network_mode: host    volumes:      - OpenList:/opt/openlist/data    environment:      - PUID=0      - PGID=0      - UMASK=022
volumes:  OpenList:
Start the container
docker-compose -f docker-compose.yml up -dCheck container status
docker logs openlist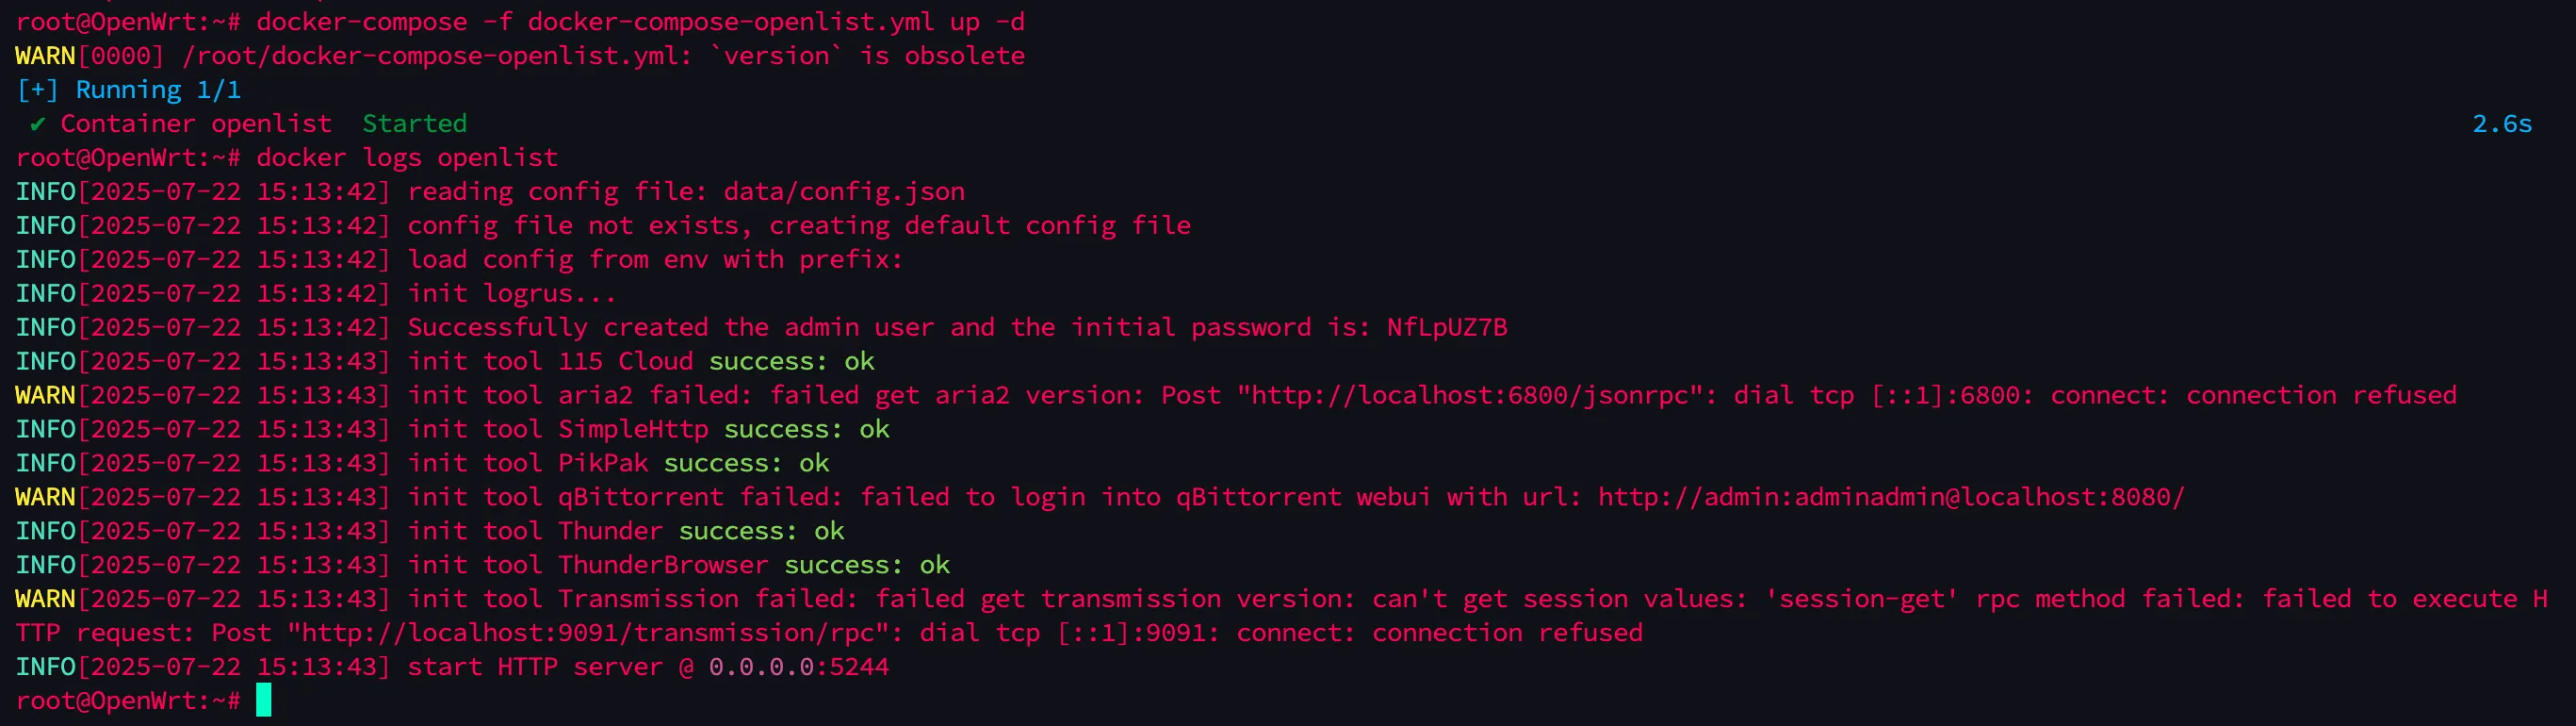
You can see the container started successfully, and the password is in the output of docker logs openlist.
Add Cloud Drive
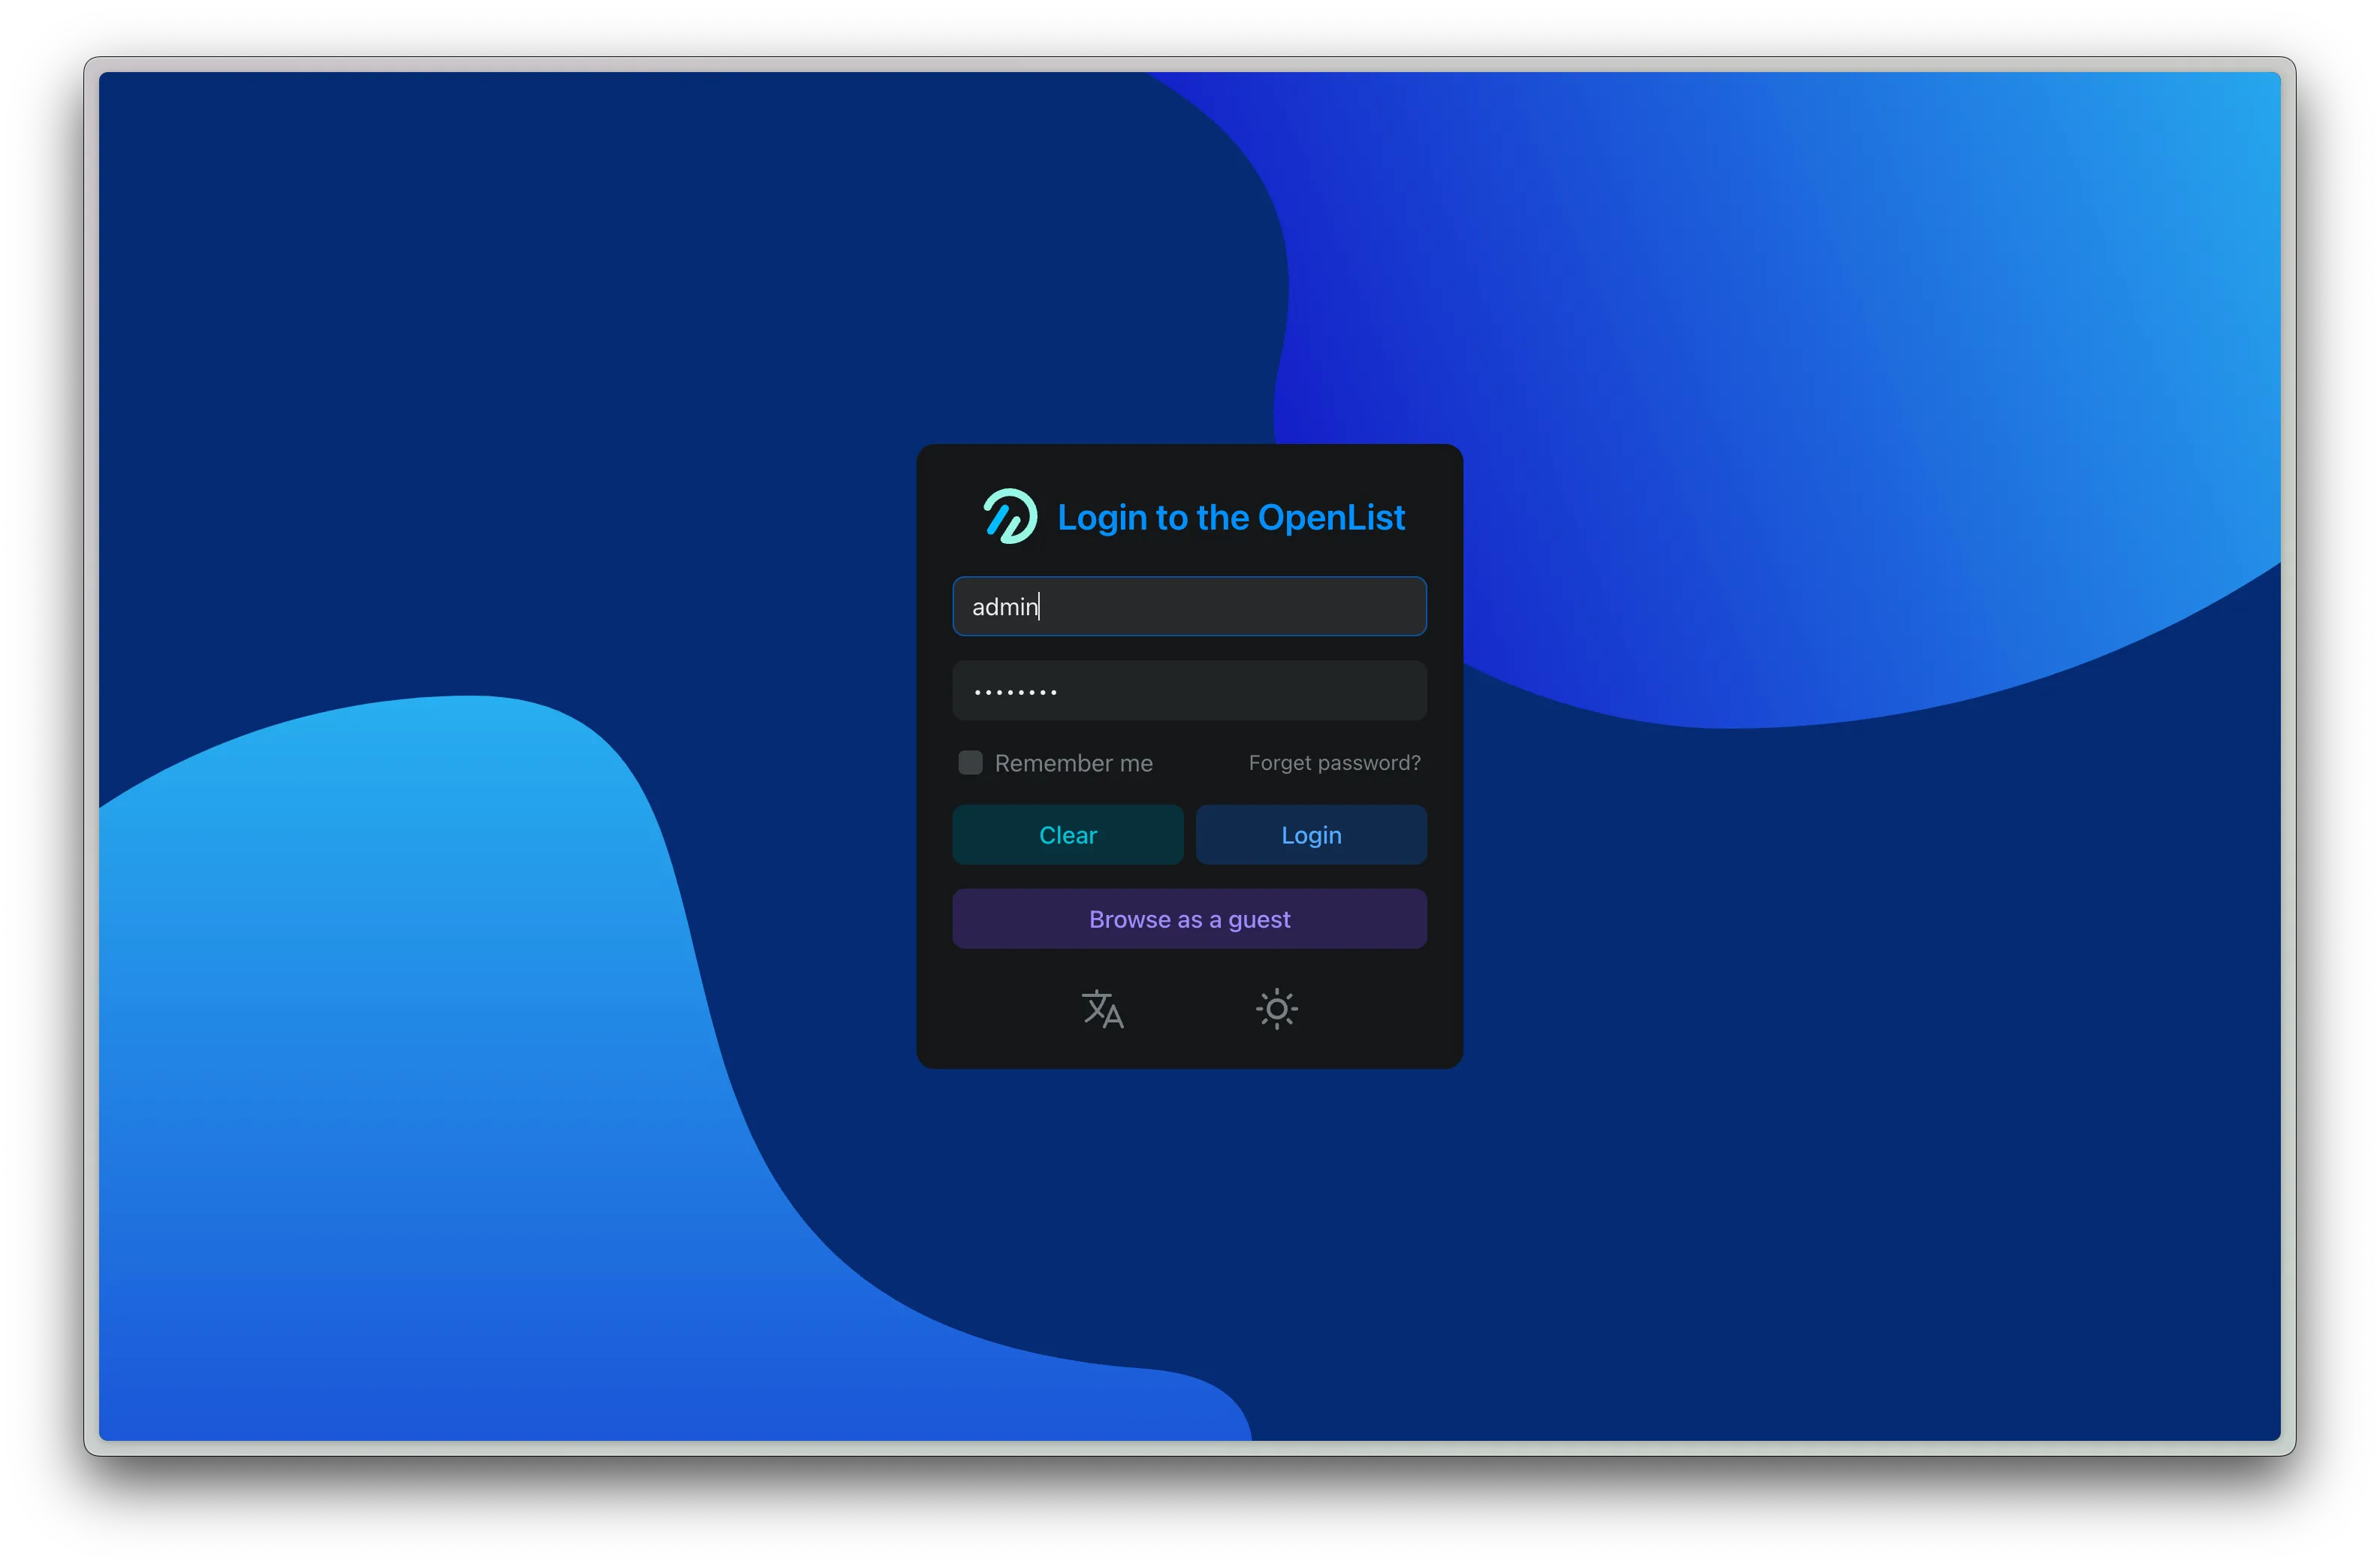
Visit http://<OpenWrtIP>:5244 and log in (password is from docker logs openlist output)
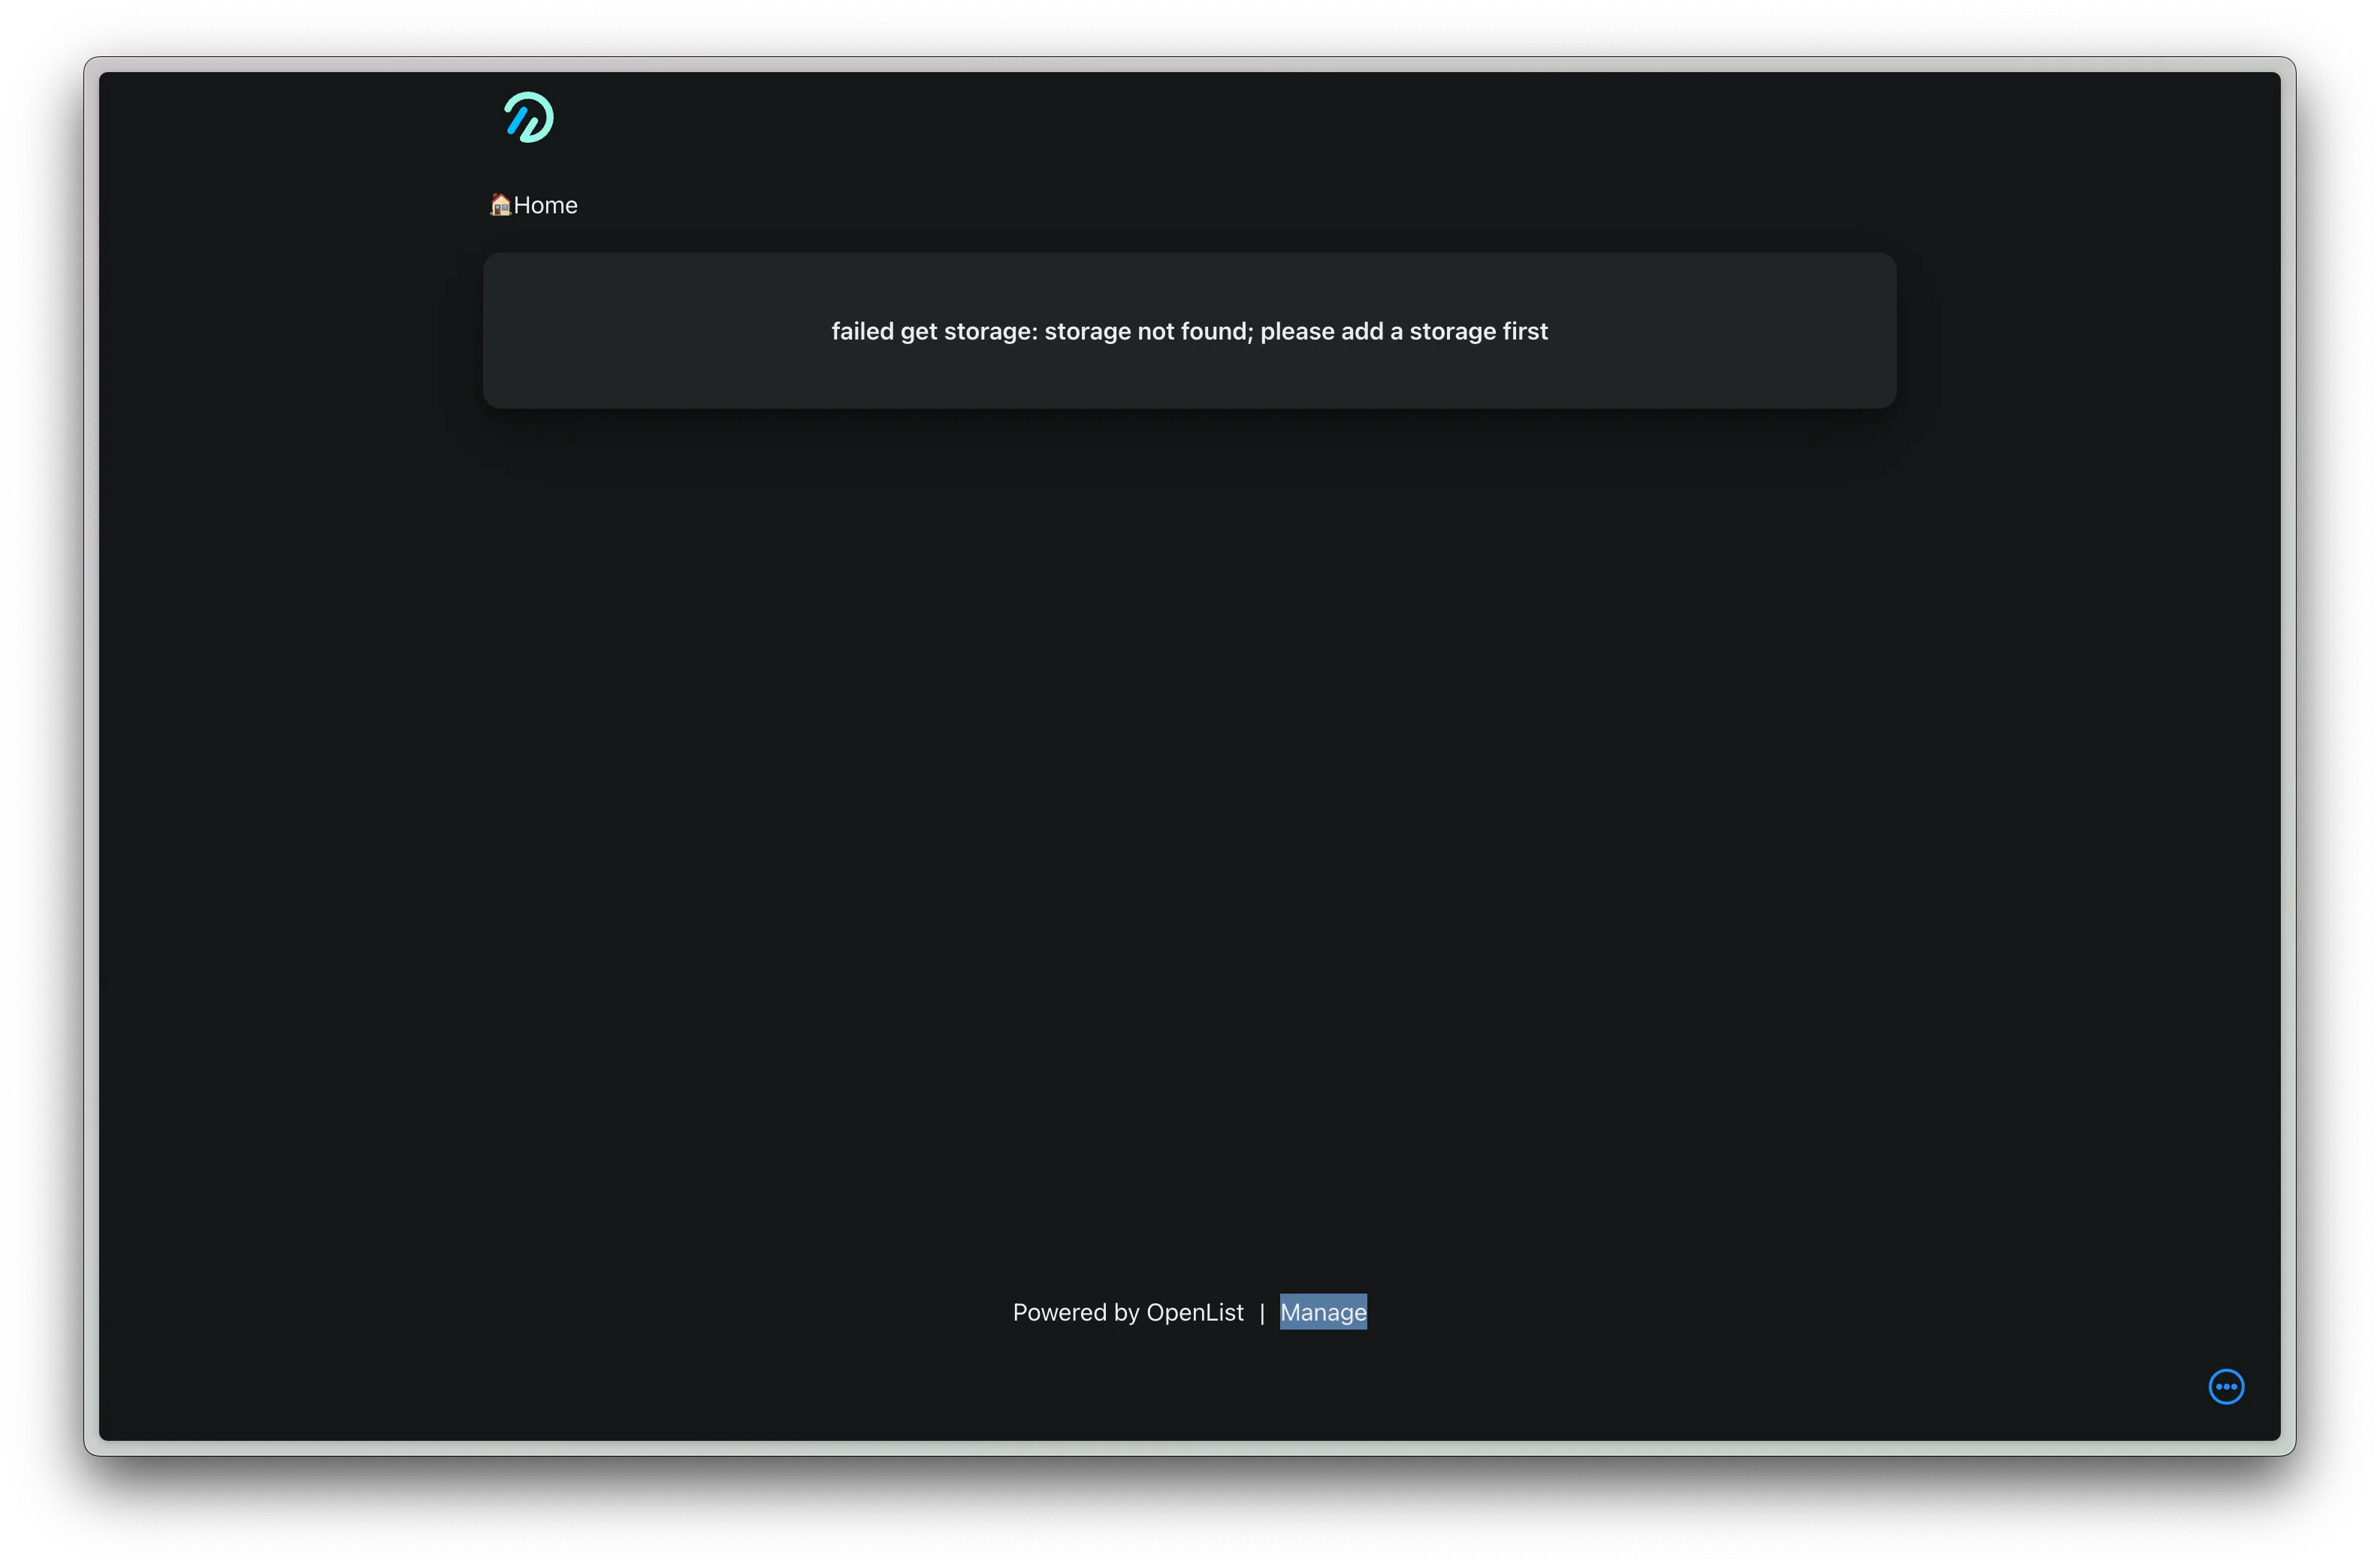
After logging in, click Manage
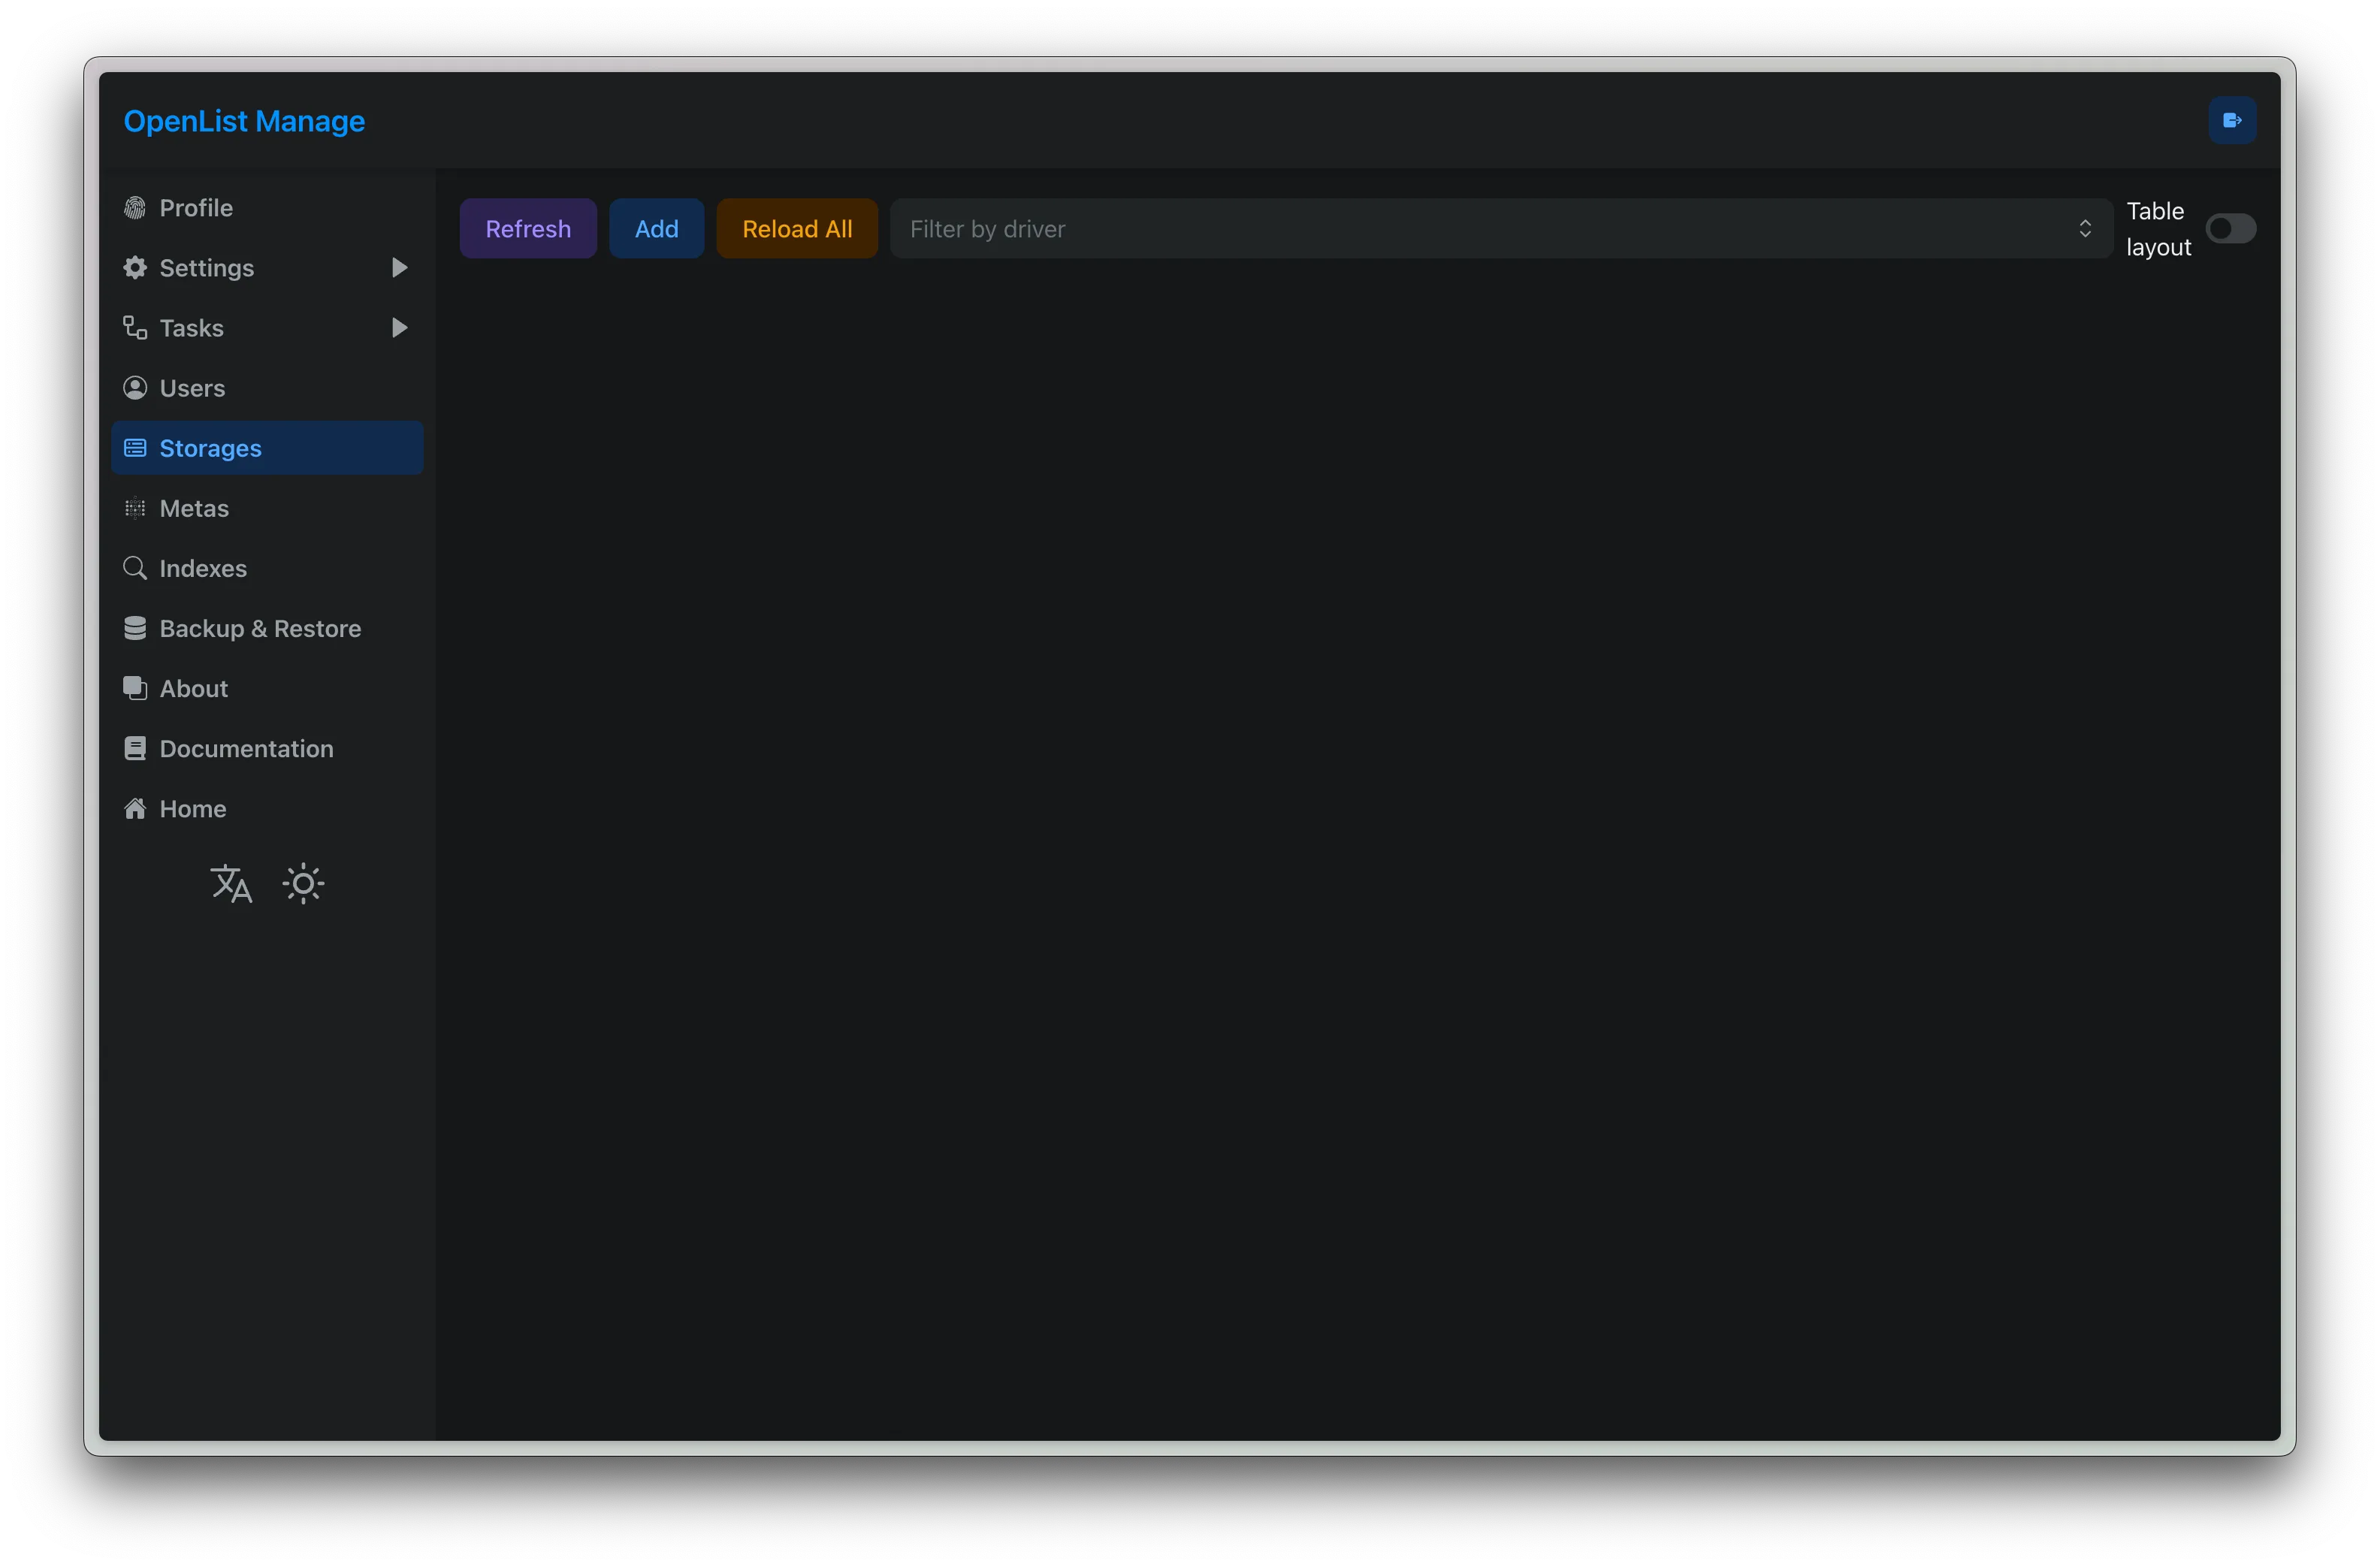
In the Storages section, click Add to add storage
Select 123Open
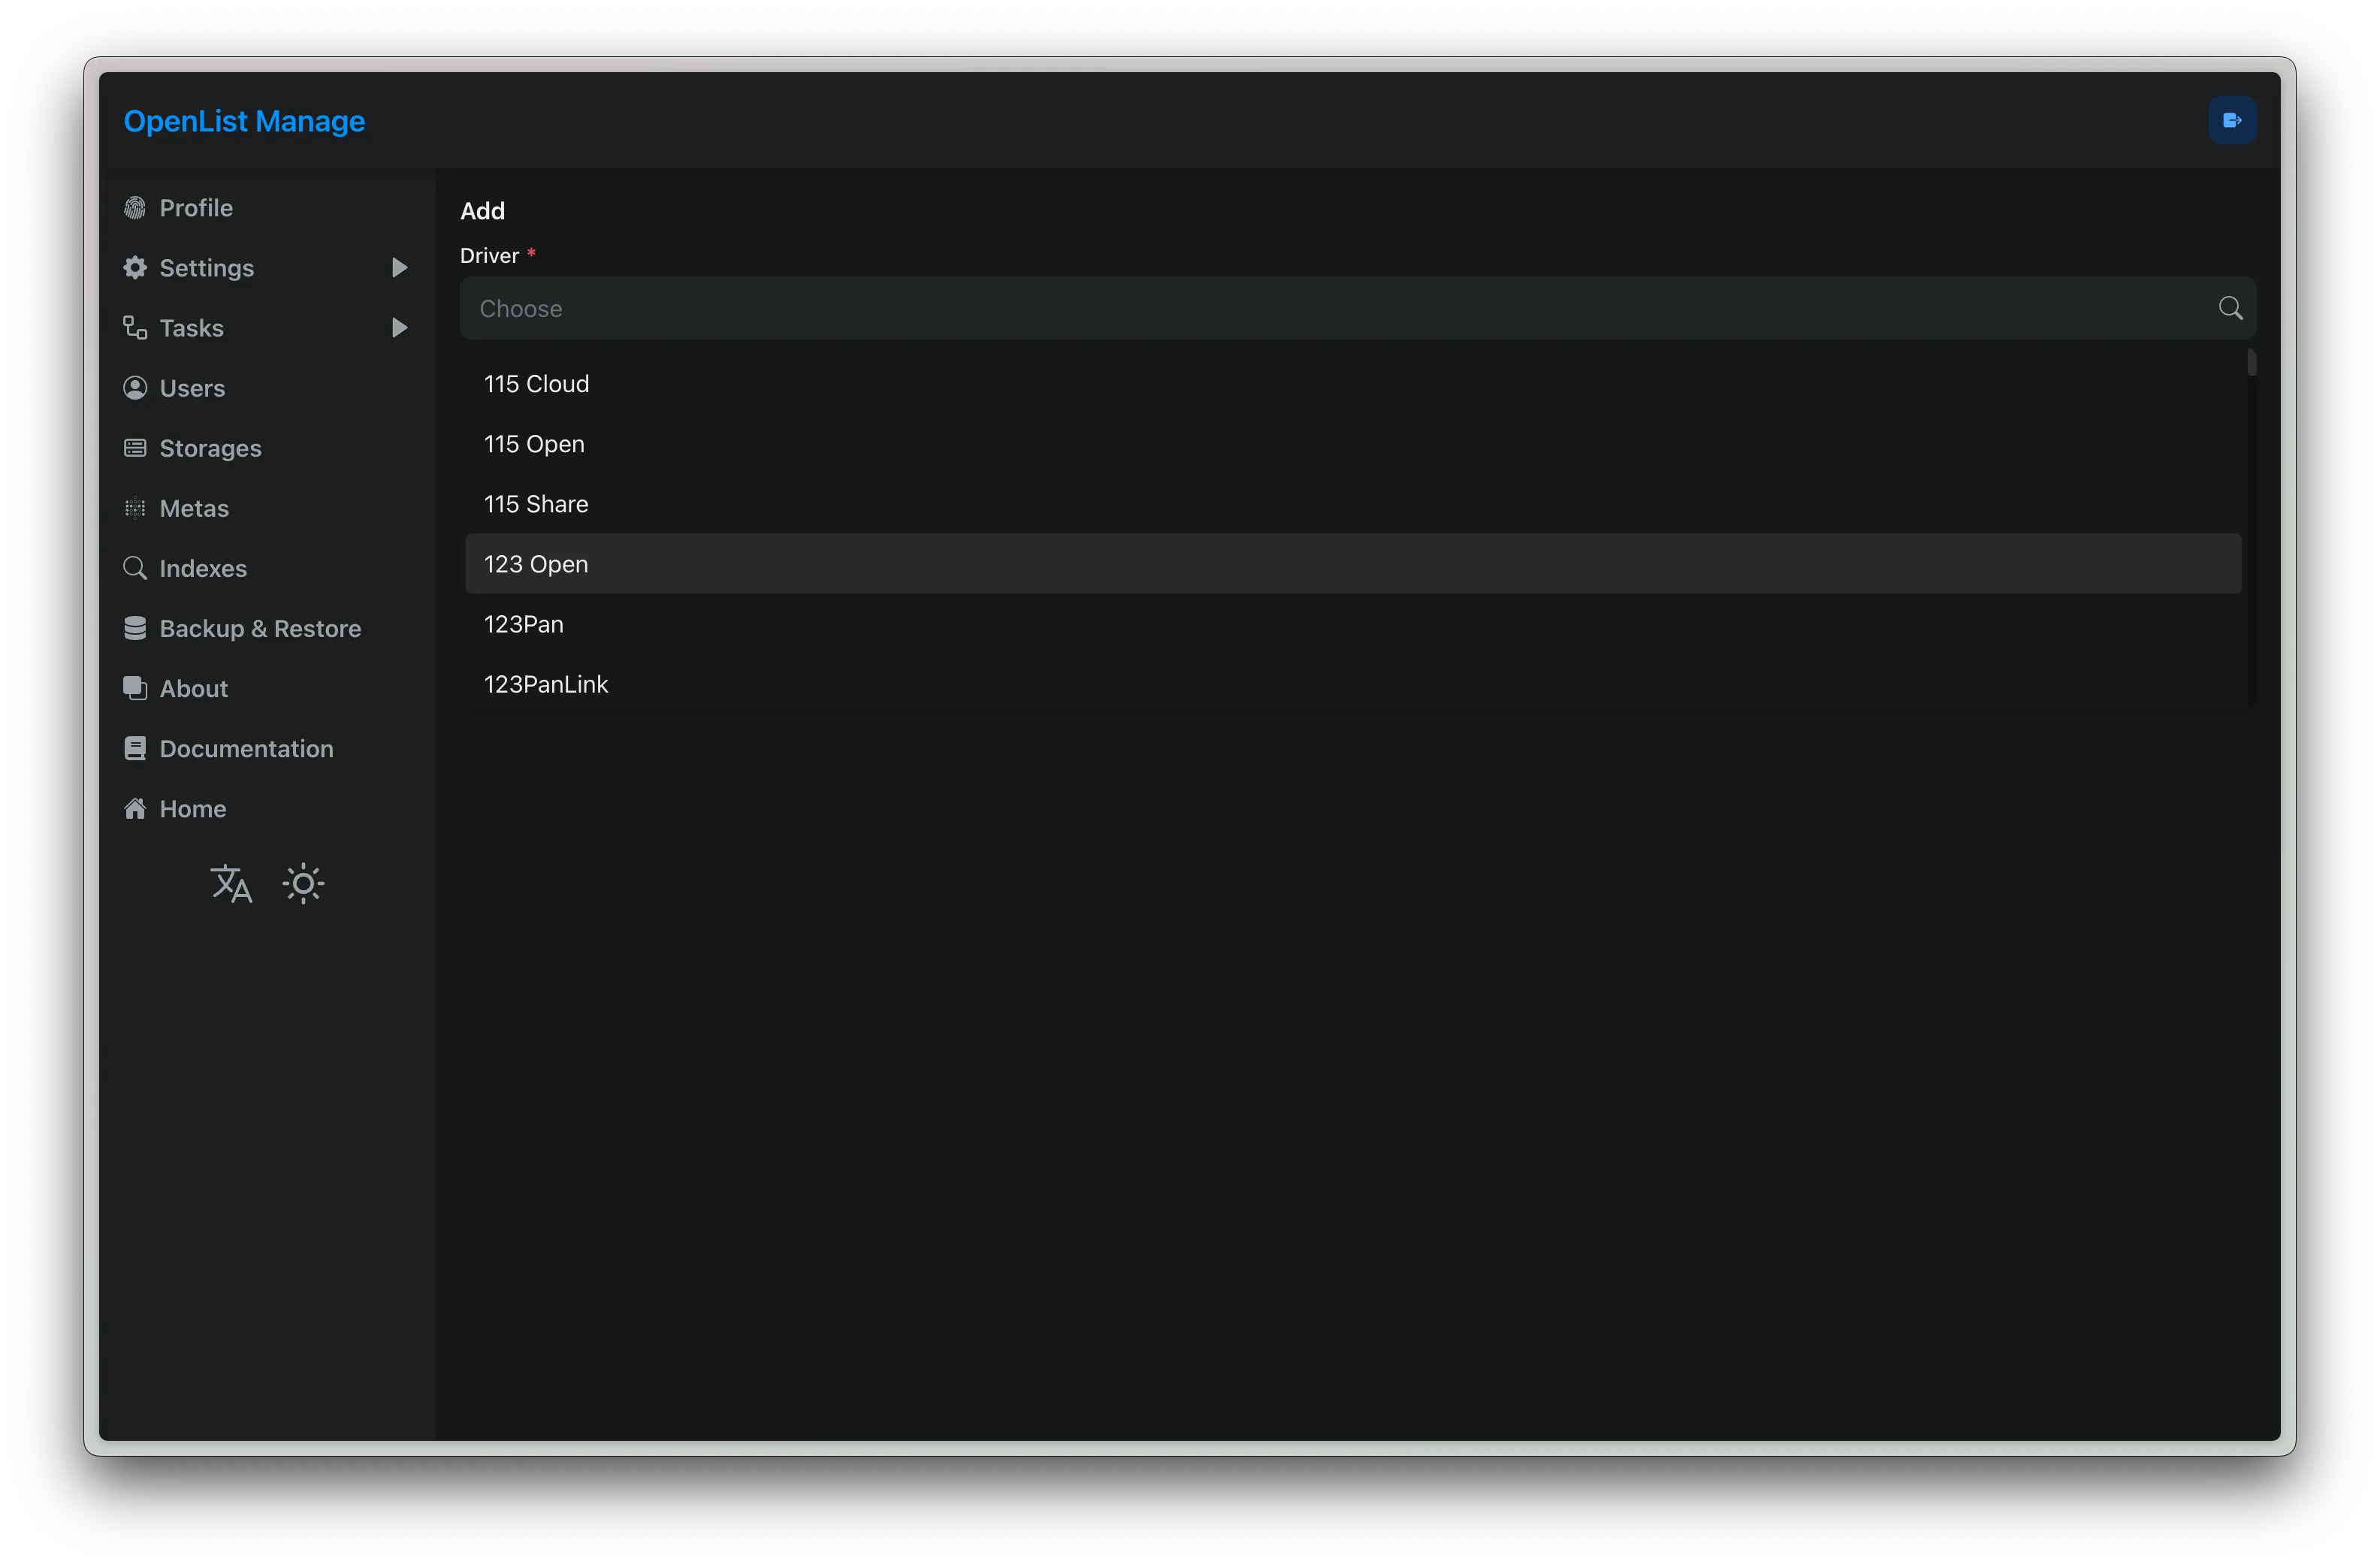
Fill in Mount Path, ClientID, ClientSecret
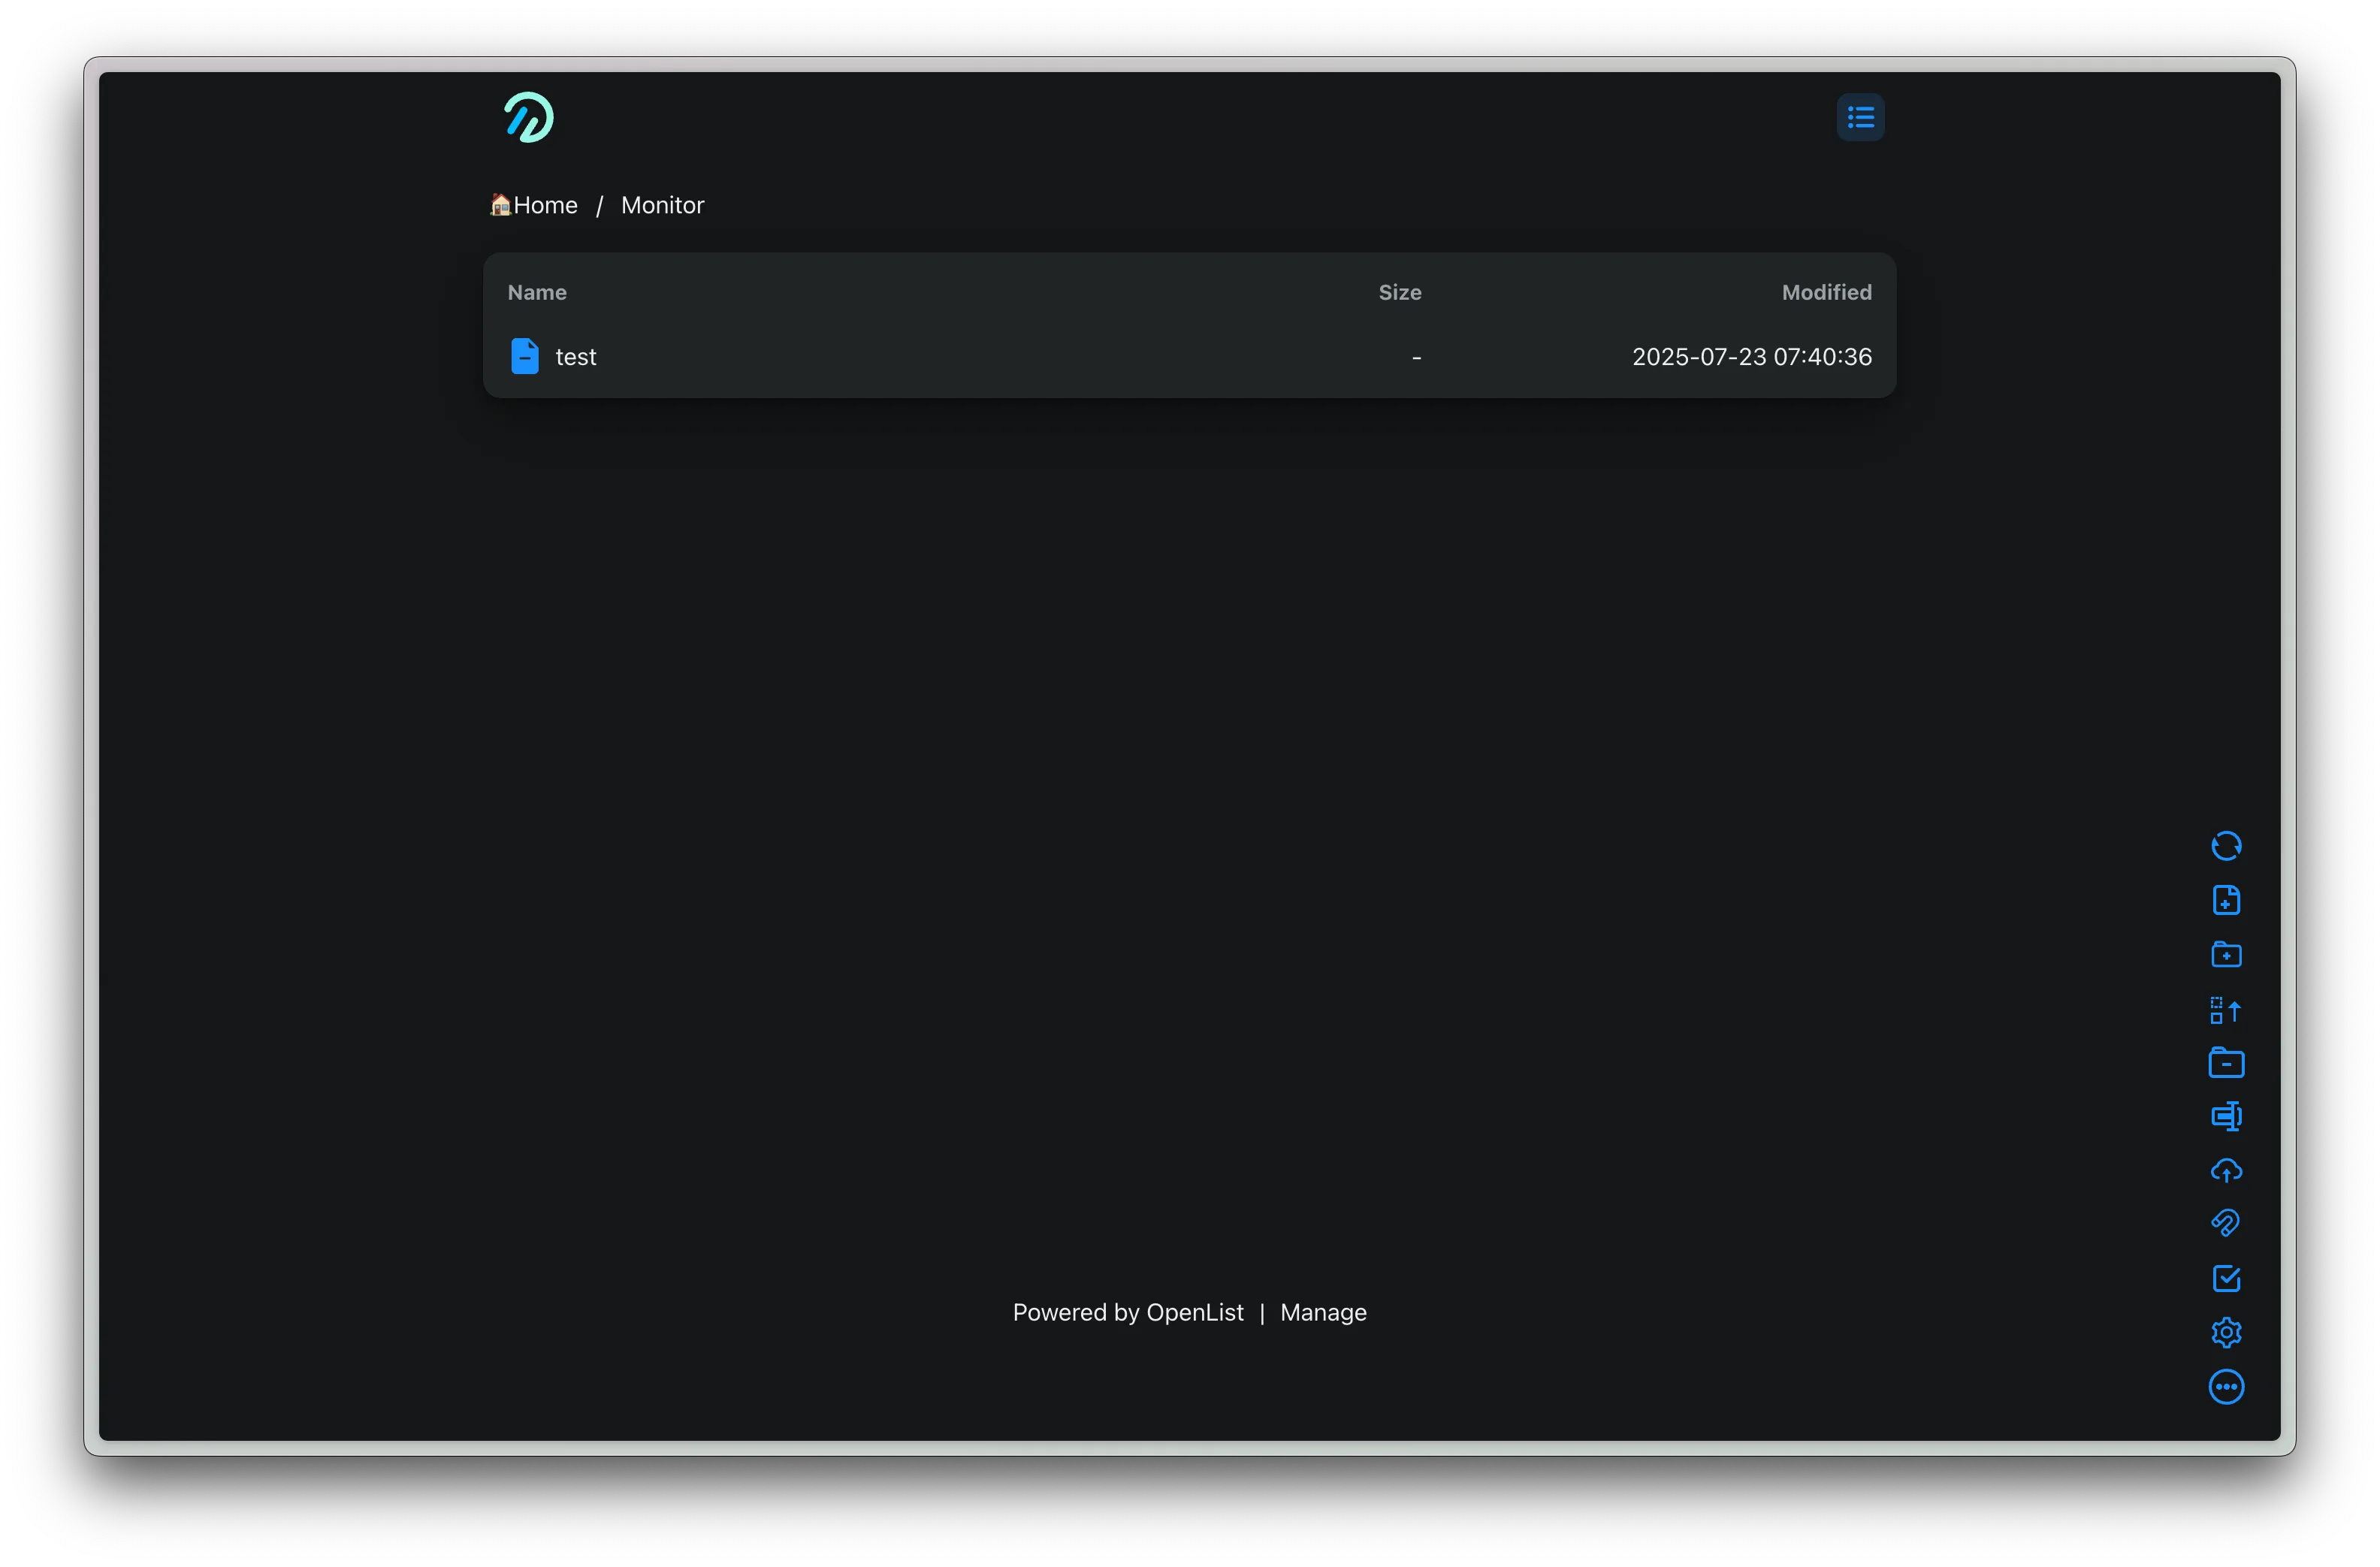
Return to the main interface, you should see the directory and be able to access it normally
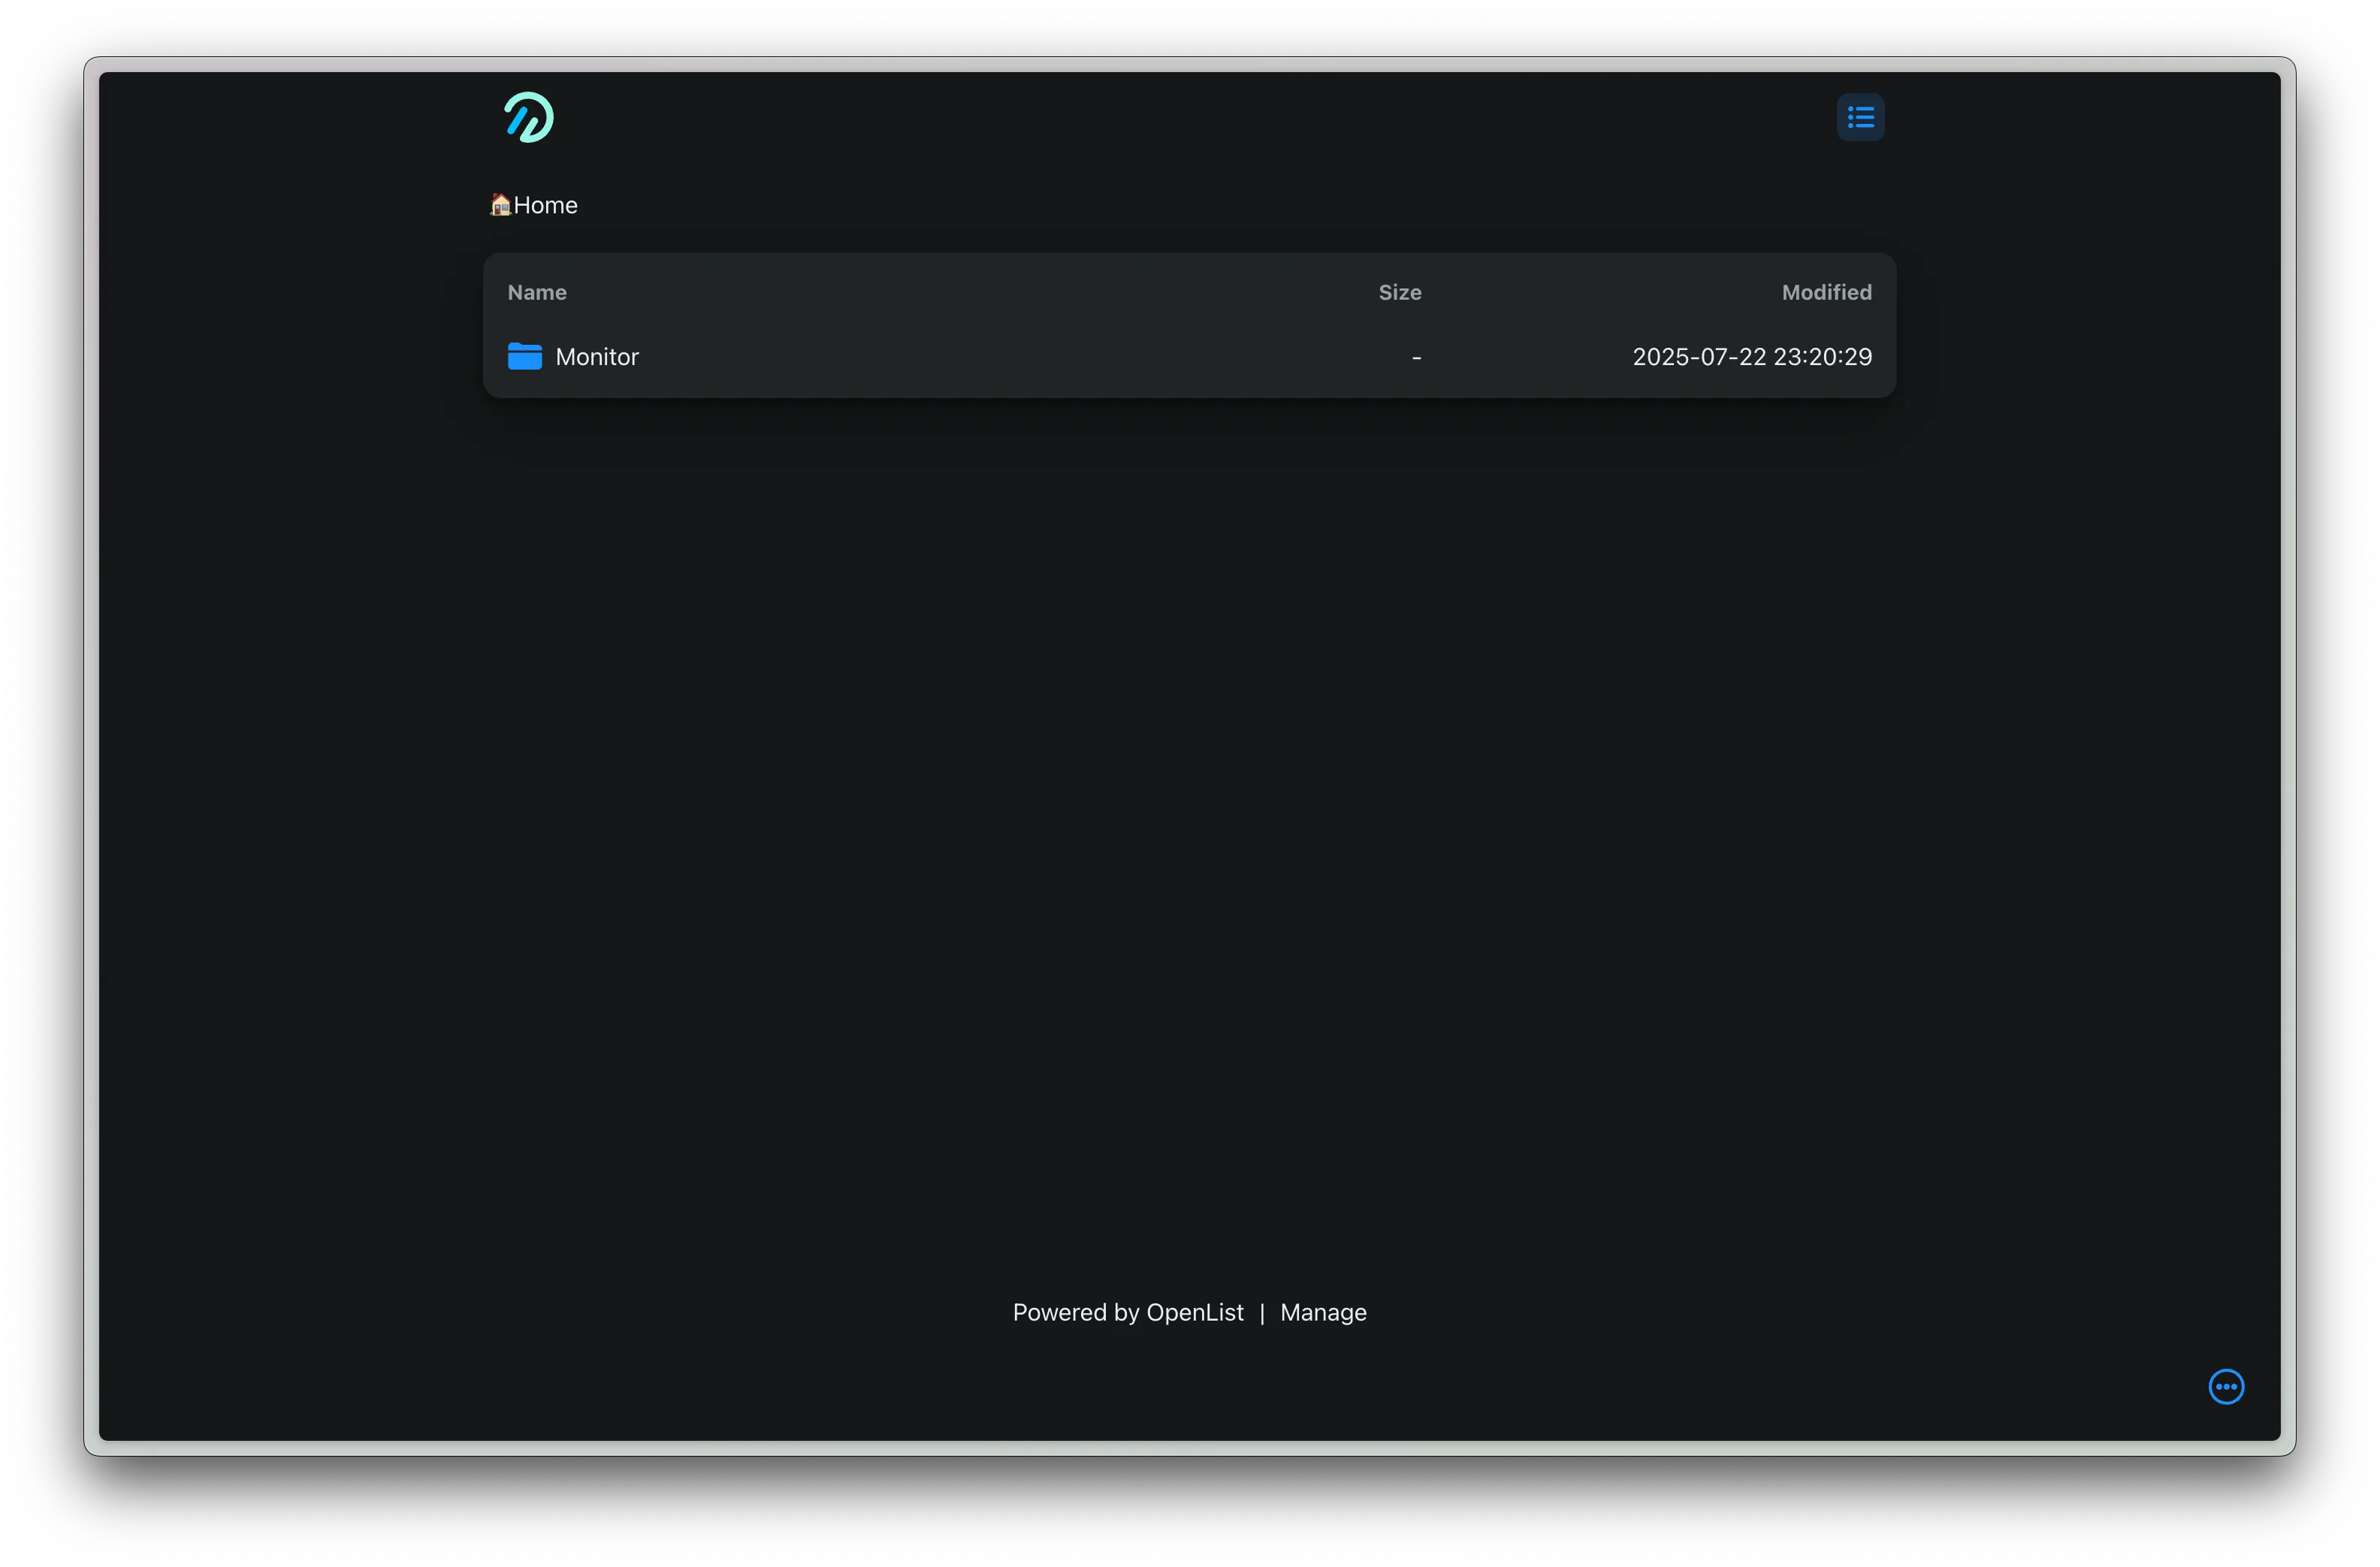
Click the create file button in the bottom right toolbar to test access to the cloud drive, and create a test file test
Note: If you want to encrypt the surveillance footage before uploading, you need to configure a Crypt drive, and set the WebDAV user’s root directory to the encrypted drive. See OpenList Docs for details.
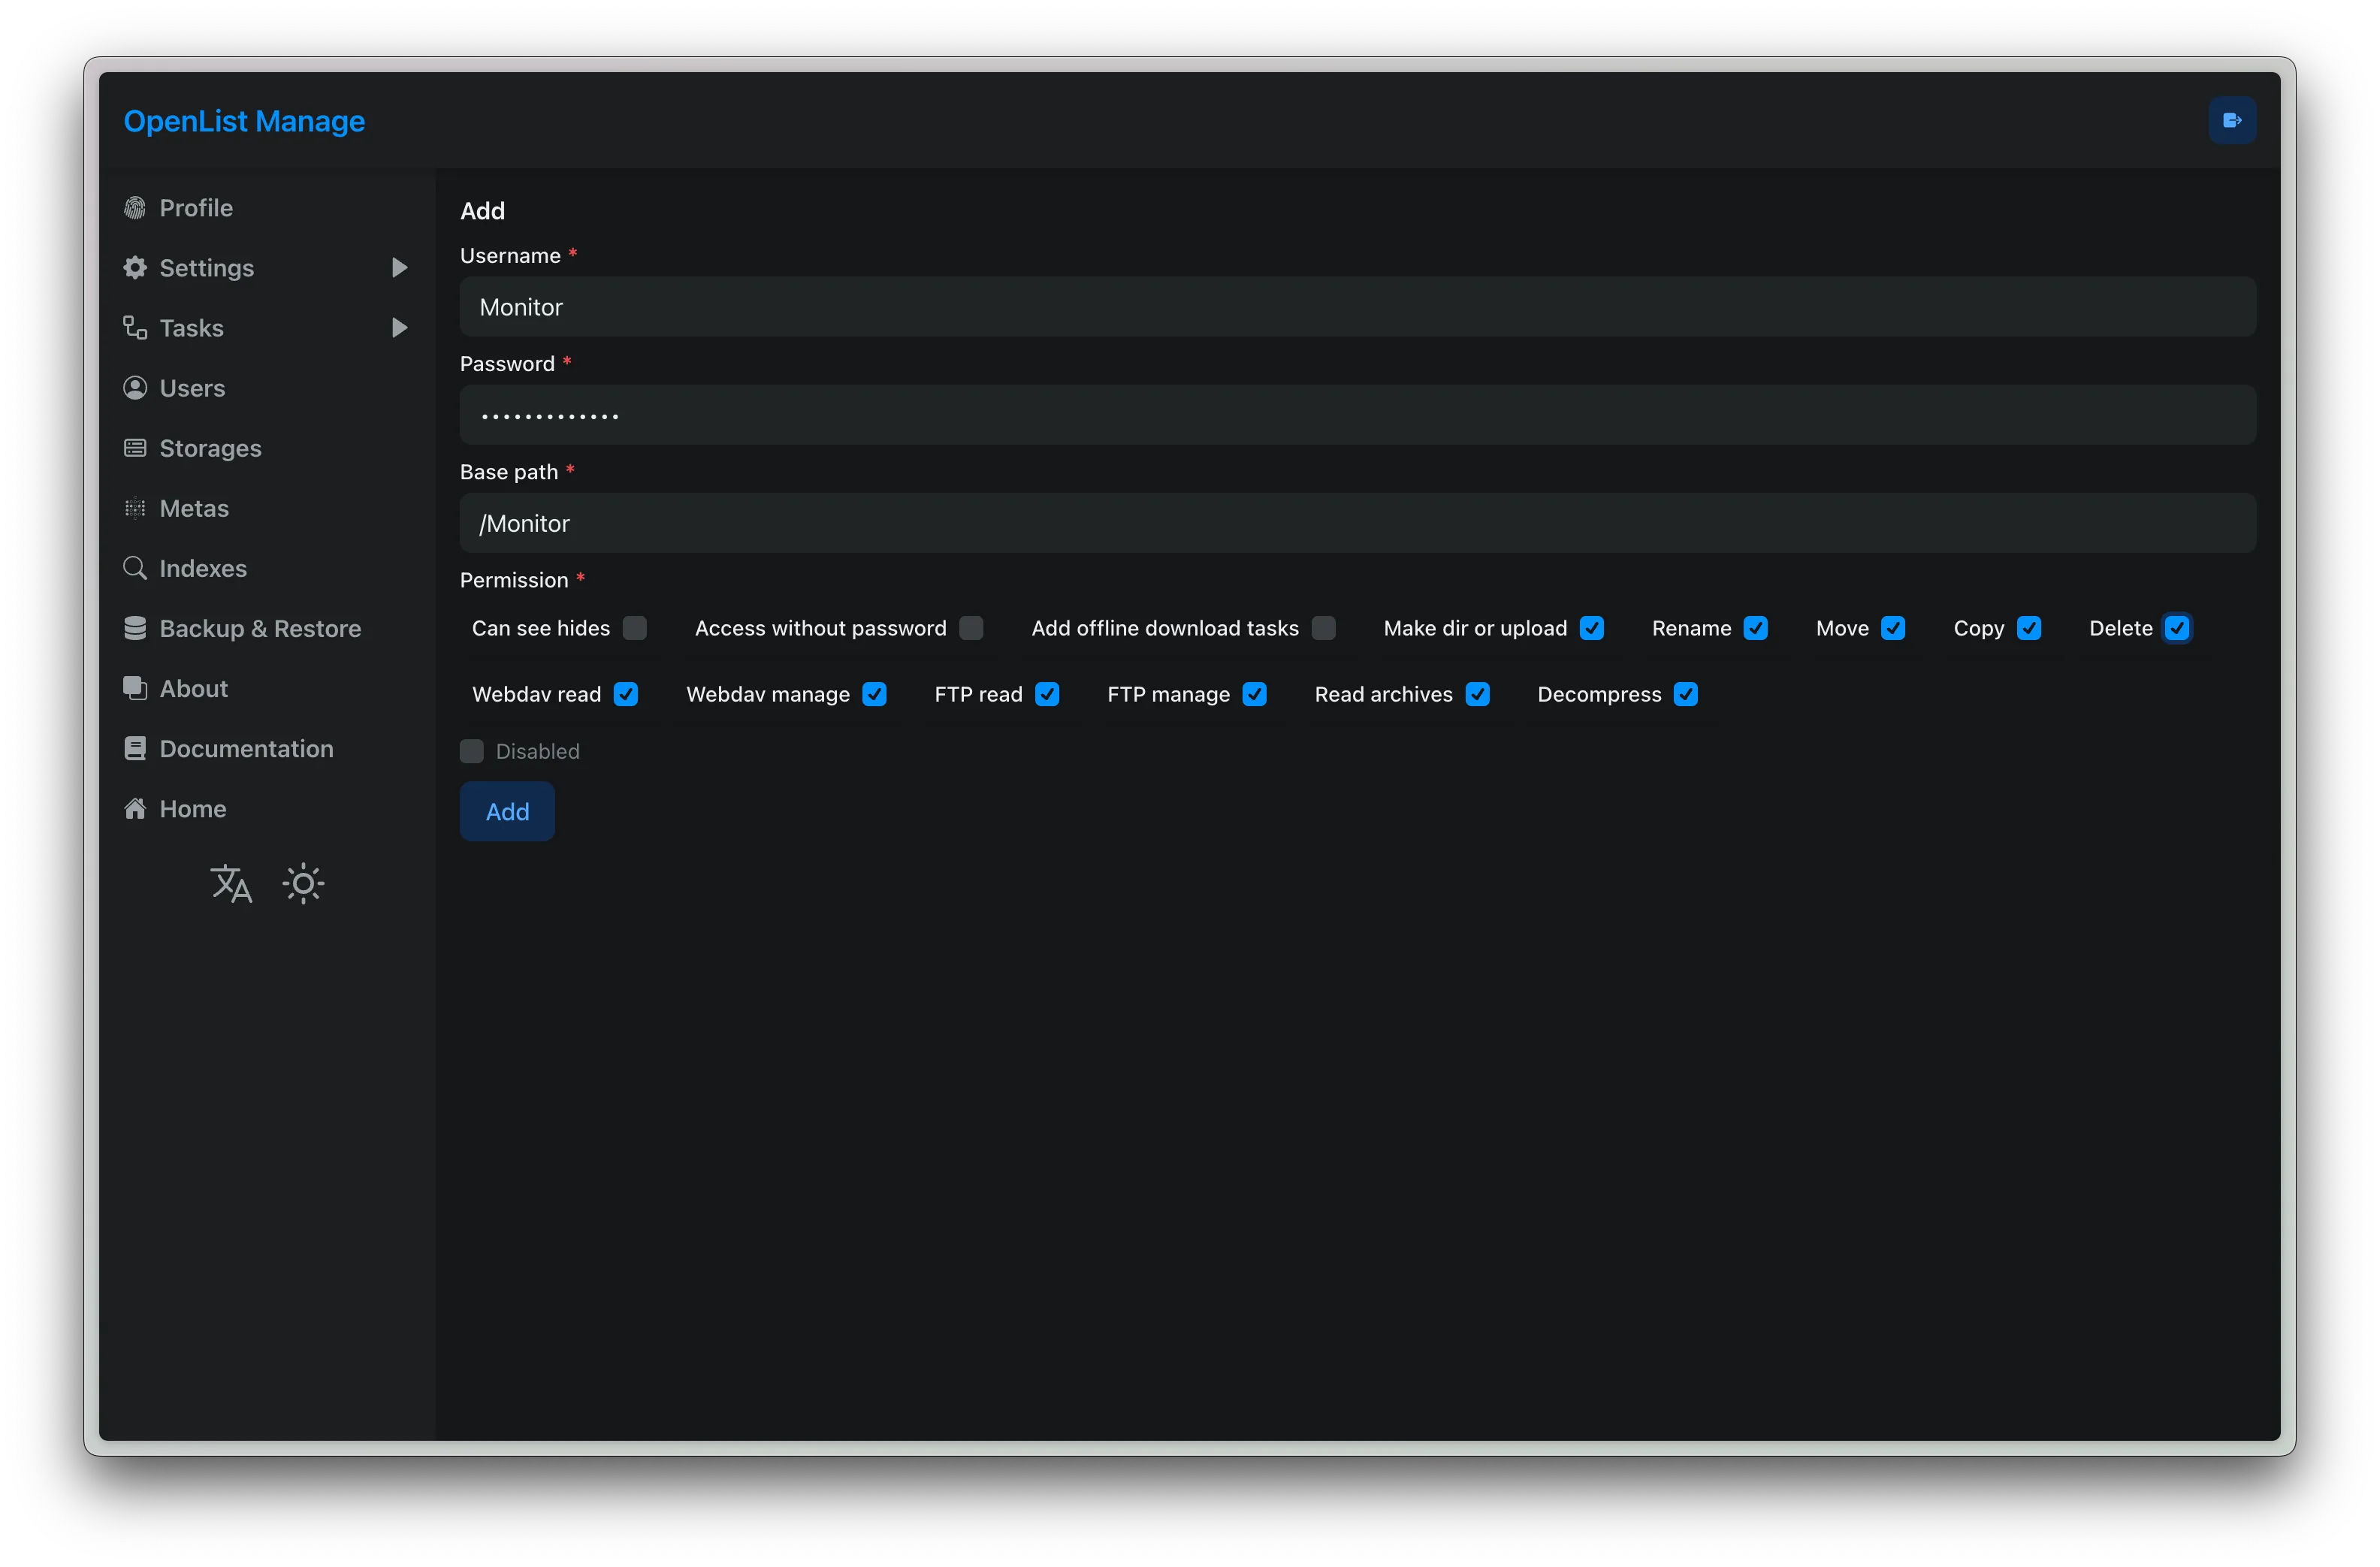
Add WebDAV User
Add a WebDAV user, paying attention to set permissions
Test access
curl -v http://127.0.0.1:5244/dav/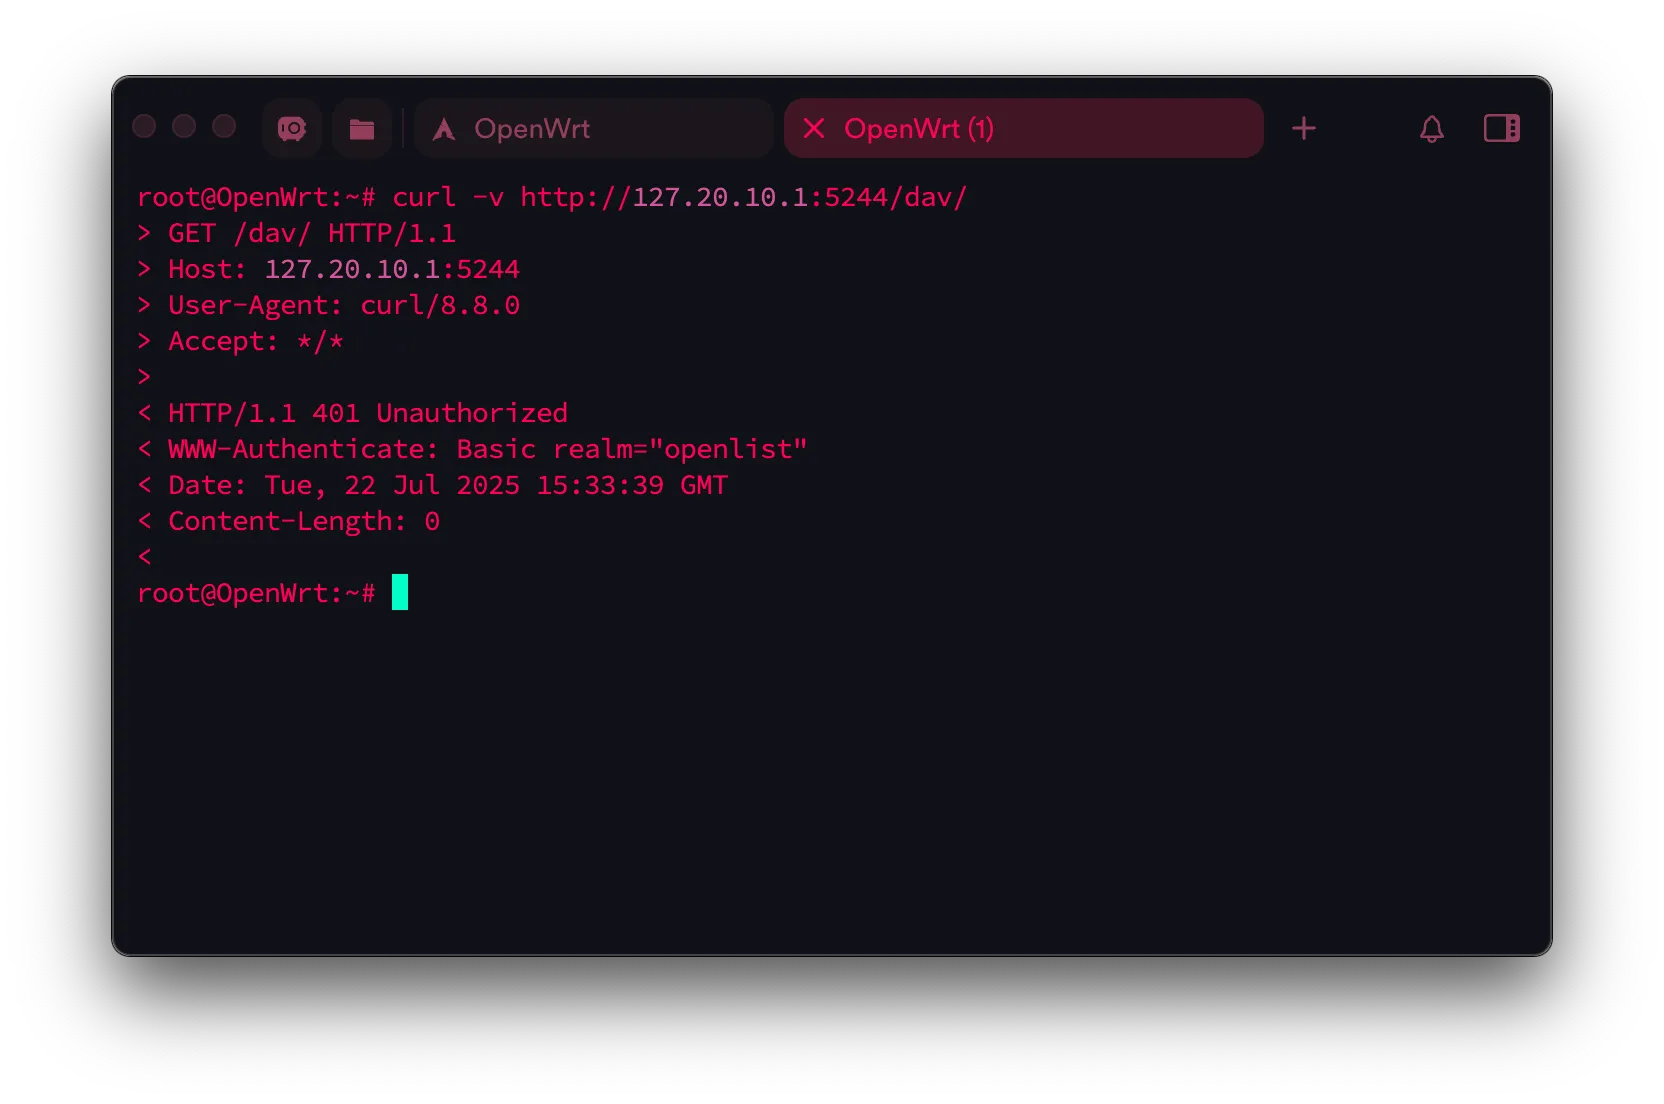
Shows 401 Unauthorized, meaning it works
Note: It is recommended to change the admin account password as well.
Rclone Configuration
Create Configuration
Enter the following command
rclone config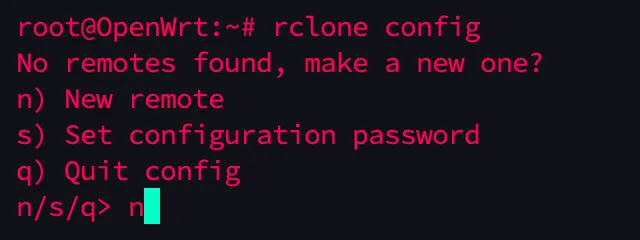
Enter n
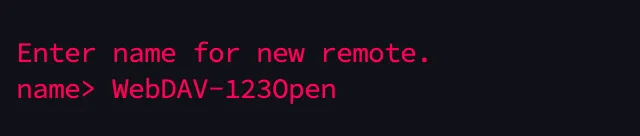
Then give this configuration a name, I use WebDAV-123Open
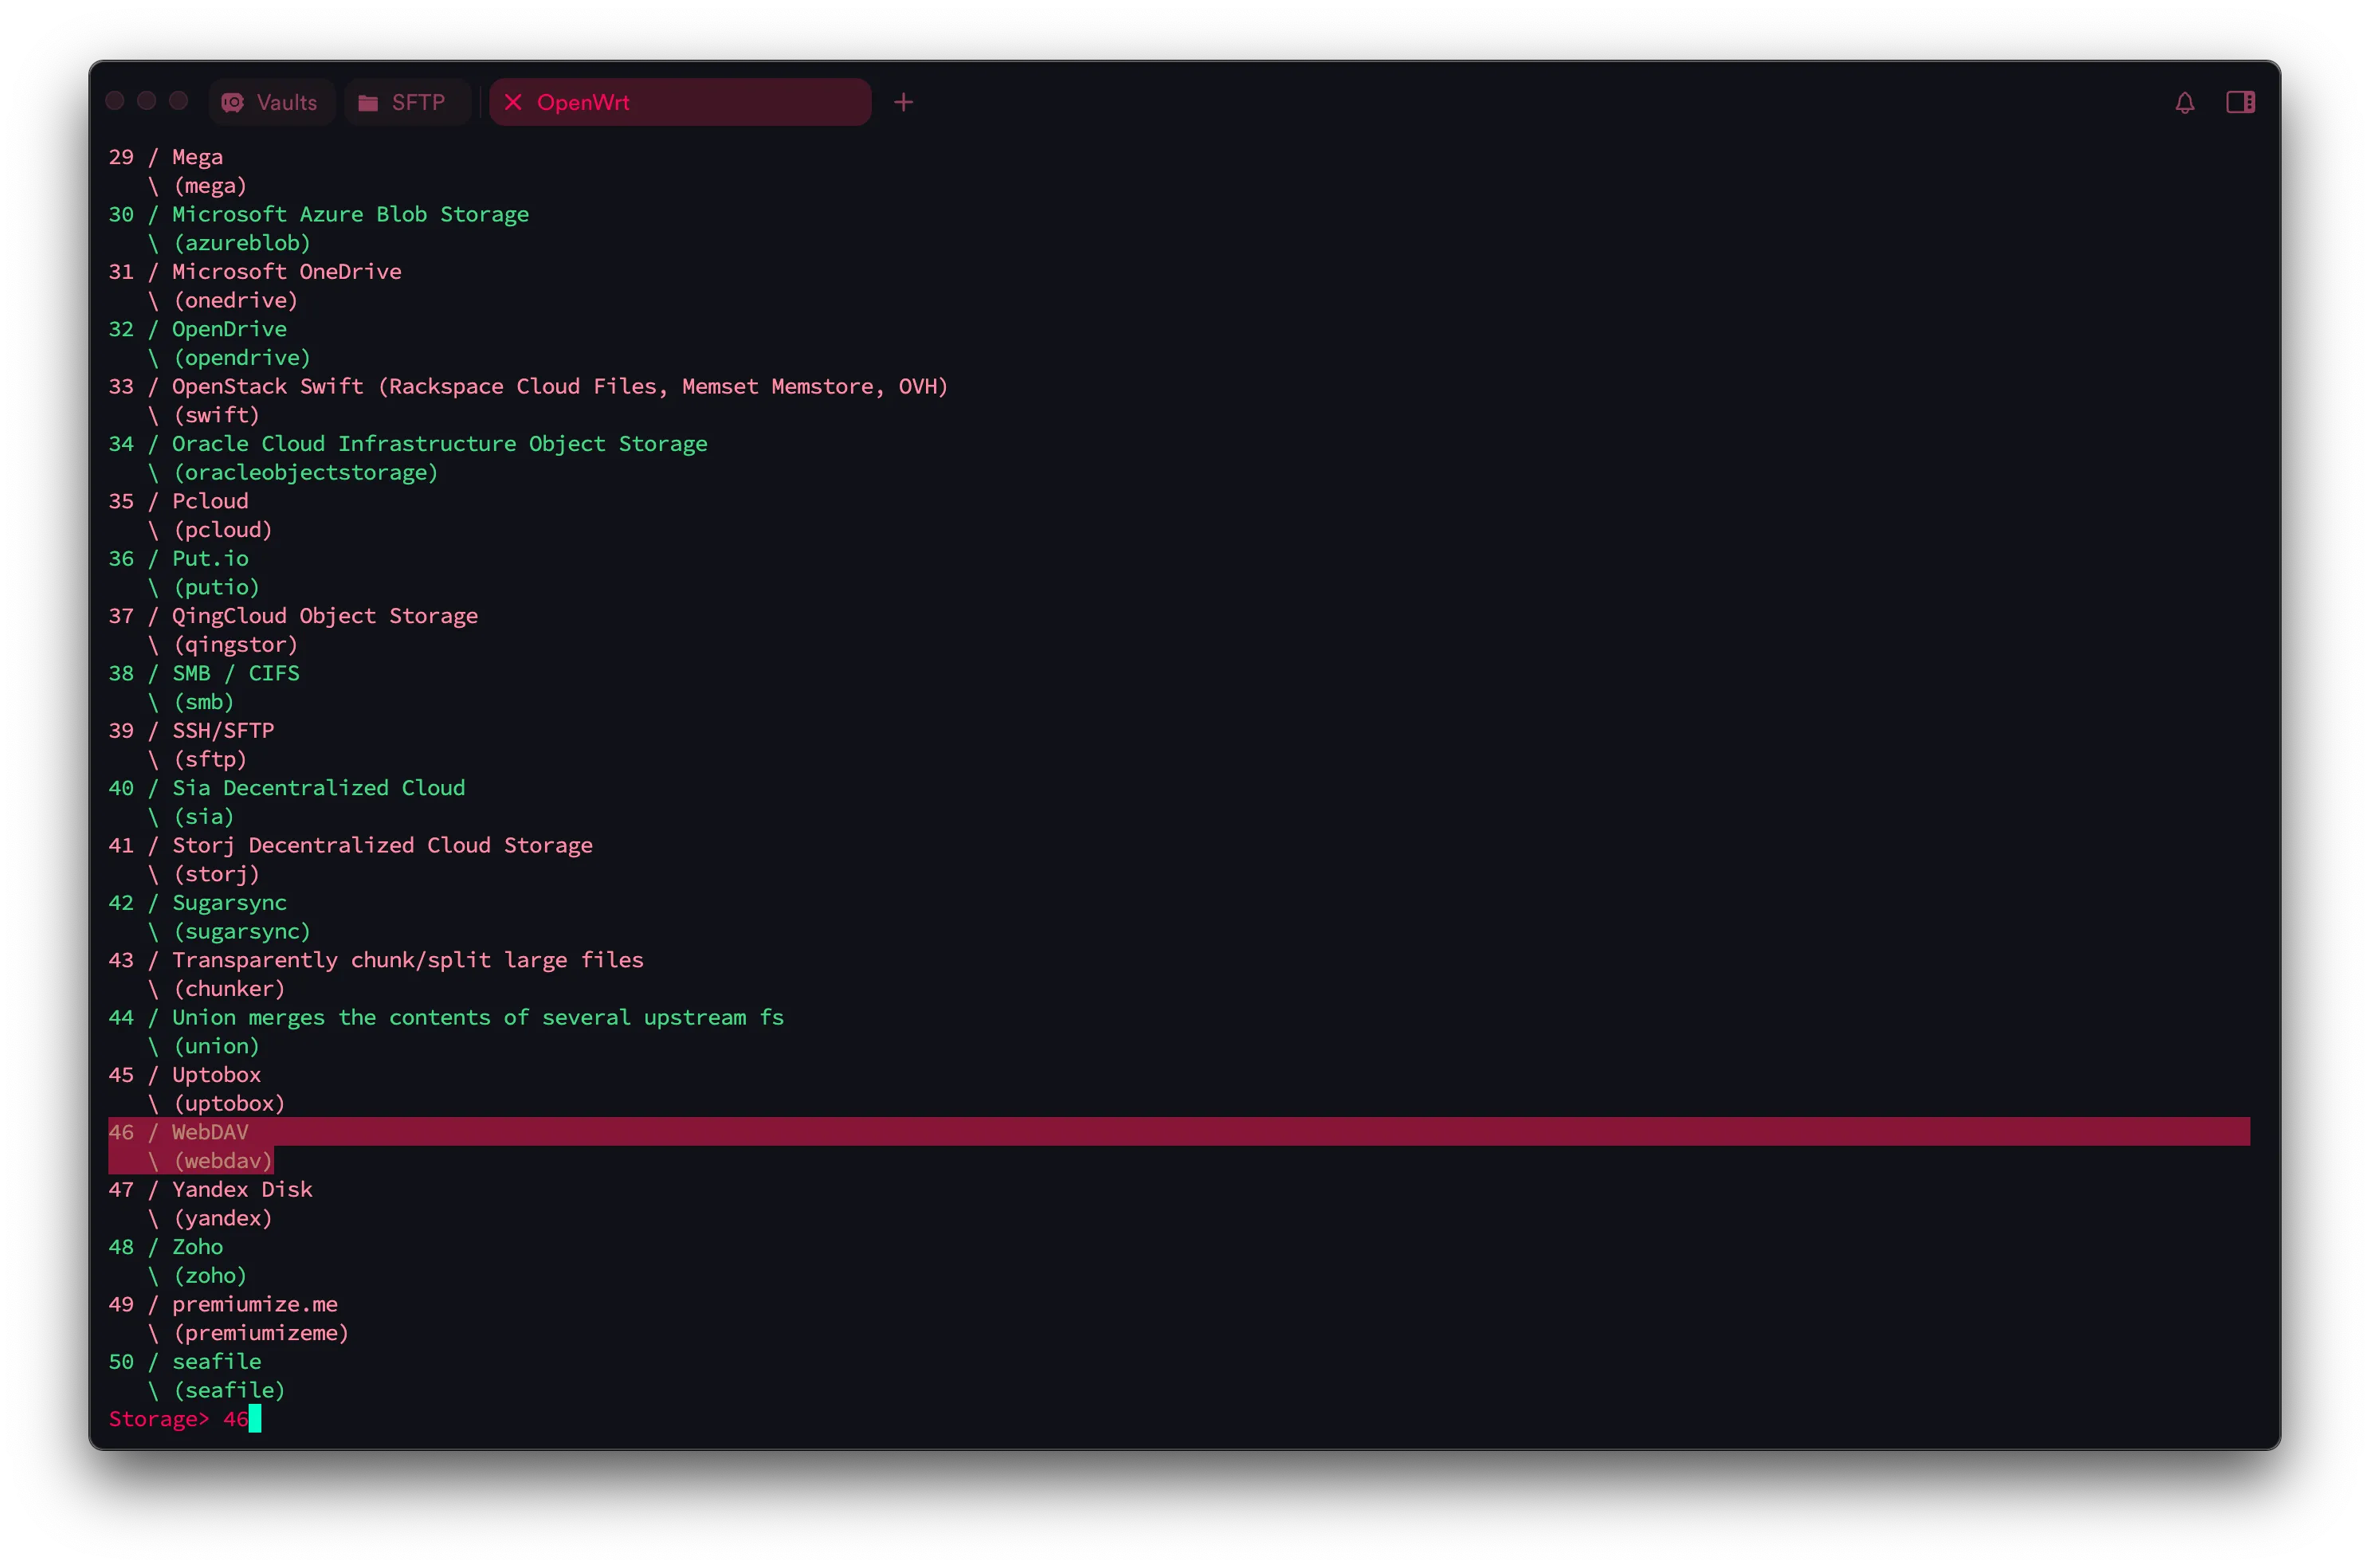
Find the number for WebDAV and enter it, mine is 46
Enter the WebDAV URL (this is the WebDAV endpoint provided by OpenList: http://Openlist-IP:5244/dav/)
http://127.20.10.1:5244/dav/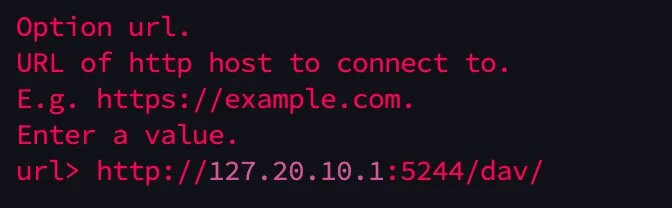
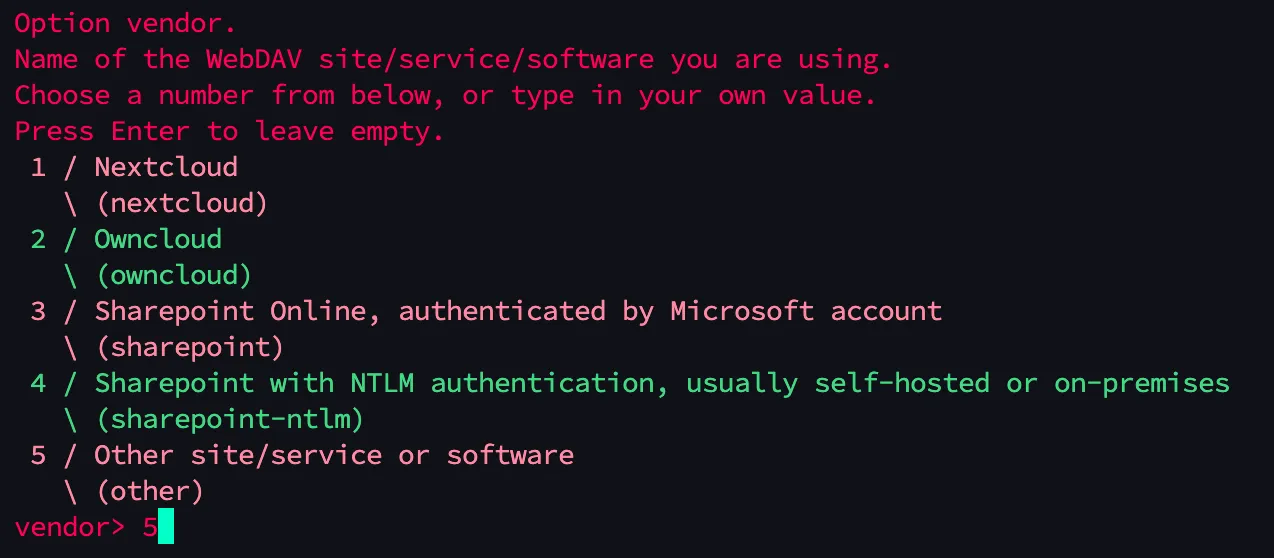
Here, choose authentication method 5 (other)
Enter the username created in OpenList

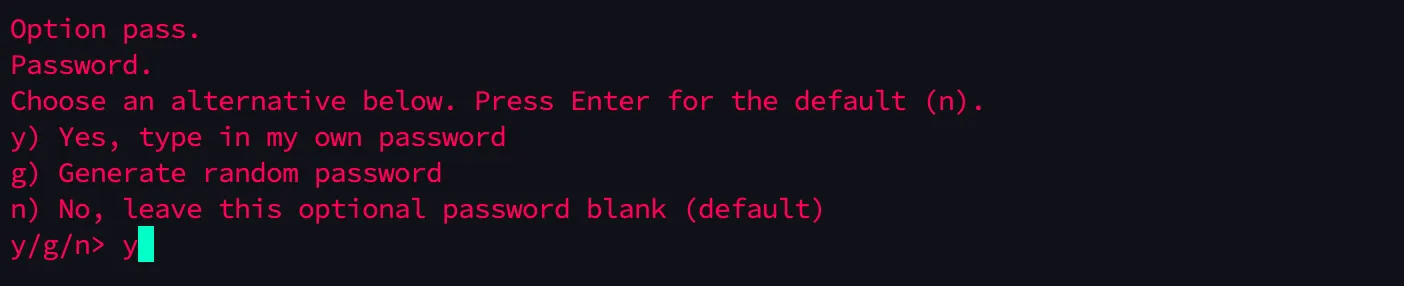
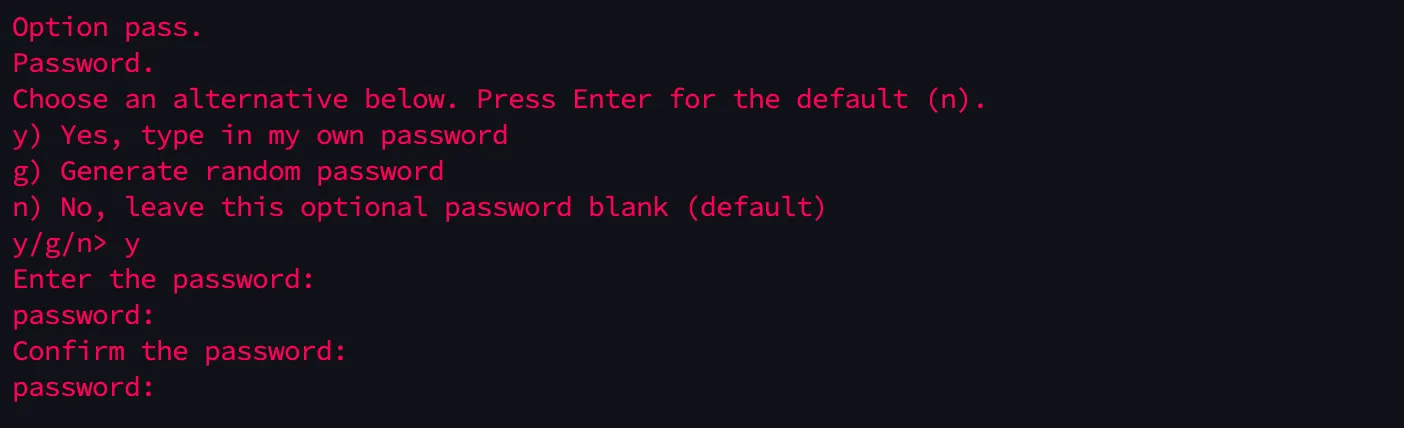
Enter the password twice (password is not displayed)
Press Enter directly here

Enter n or just press Enter

Press y or Enter
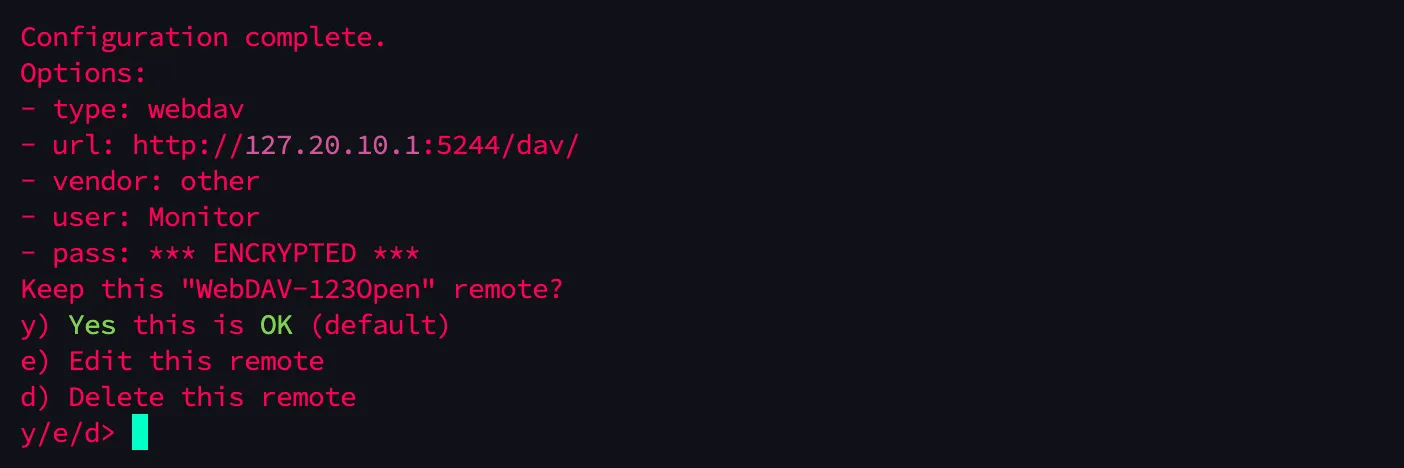
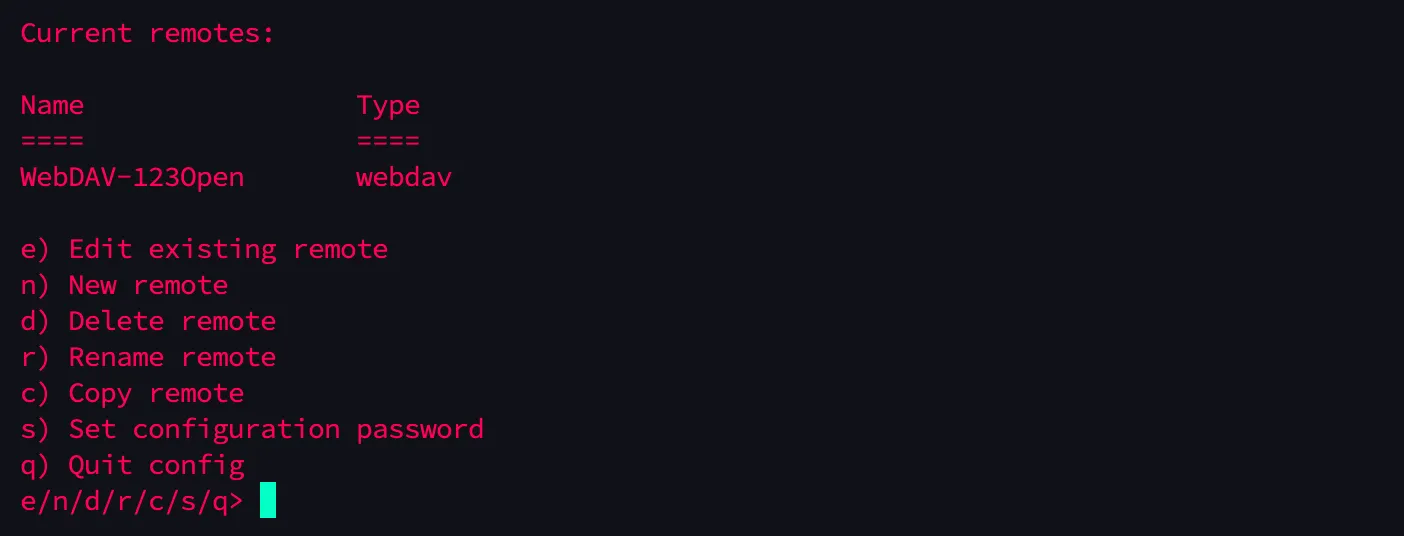
Done
Now test access
rclone ls WebDAV-123Open:You should see the test file we created earlier

Mount
Create the mount directory
mkdir -p /mnt/webdavTest mount manually
rclone mount WebDAV-123Open: /mnt/webdav --allow-other --vfs-cache-mode writes &Check if mounted successfully
df -h | grep webdavls /mnt/webdav
You can see it mounted successfully.
Unmount
fusermount -uz /mnt/webdavSet Auto-mount on Boot
Edit the /etc/rc.local file (insert the script before ‘exit 0’ to run at system startup)
vim /etc/rc.localInsert the command
sleep 15
mkdir -p /mnt/webdavchmod 777 /mnt/webdav
/usr/bin/rclone \  --config /root/.config/rclone/rclone.conf \  mount WebDAV-123Open: /mnt/webdav \  --allow-other \  --dir-perms 0777 \  --file-perms 0777 \  --umask 000 \  --vfs-cache-mode writes \  --buffer-size 256M \  --vfs-read-chunk-size 32M \  --vfs-read-chunk-size-limit off \  --vfs-cache-max-age 5m \  --dir-cache-time 1h \  --no-modtime \  --no-checksum \  --contimeout 5m \  --timeout 10m \  --retries 10 \  --low-level-retries 20 \  --log-level DEBUG \  --log-file /tmp/rclone-mount.log \  --daemon &
Manually trigger and check if it mounts (if there are other instructions in /etc/rc.local, you can directly execute the inserted command)
/etc/rc.local
df -h | grep webdavls /mnt/webdav
If you see text.txt as before, it works.
Reboot the device and check if it mounts automatically
rebootAfter reconnecting, run
sleep 30df -h | grep webdavls /mnt/webdav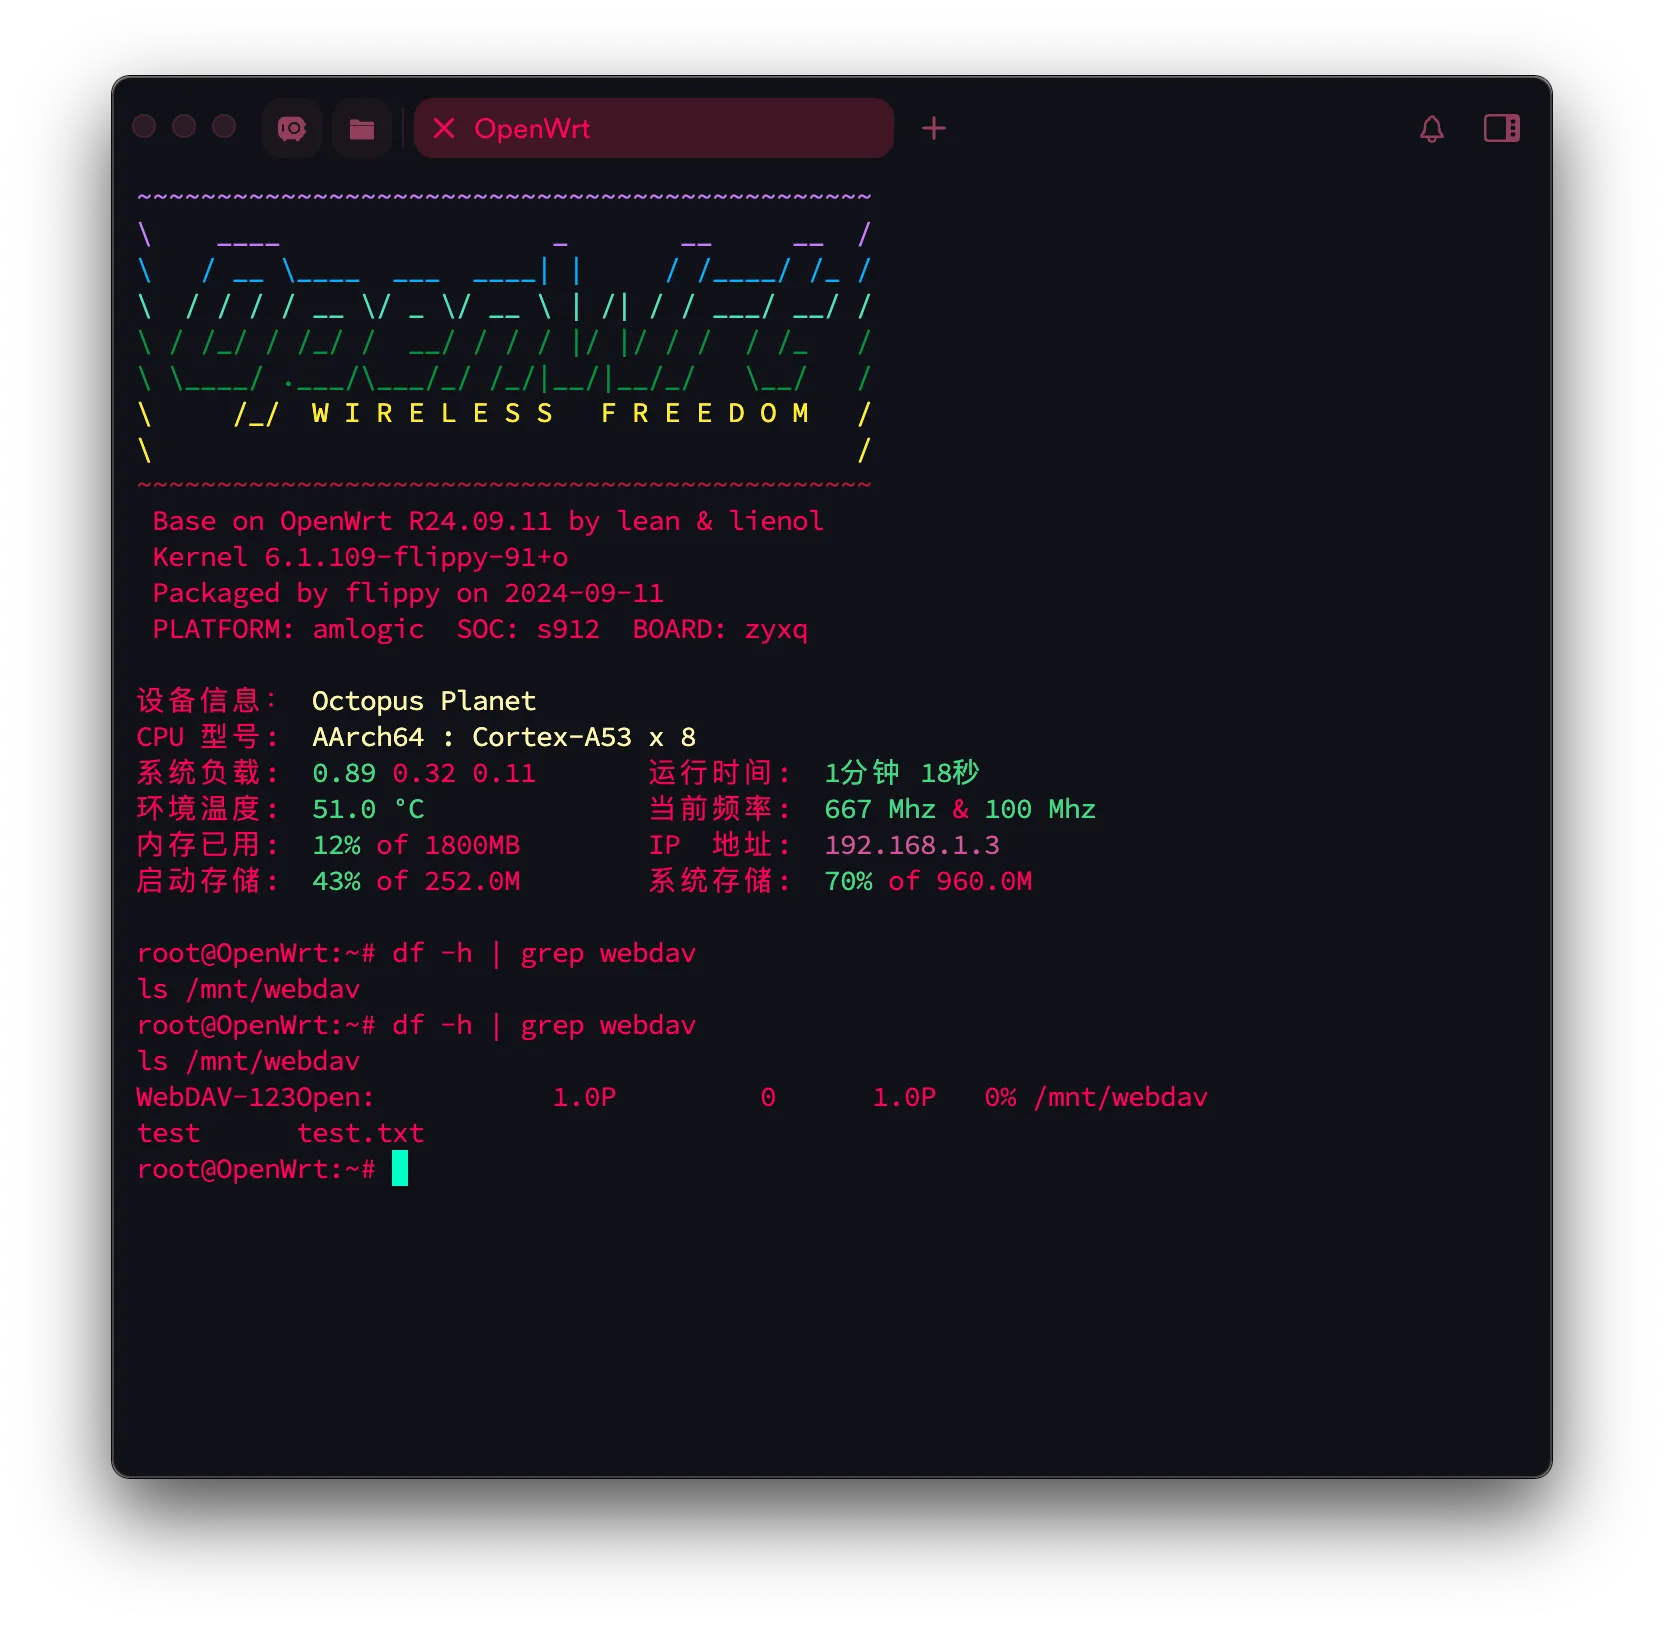
Works.
Rclone configuration is complete. Next, configure Samba.
Samba Configuration
Install Samba
Install luci-app-samba4
opkg updateopkg install luci-app-samba4This should automatically install:
- samba4-libs
- samba4-server
- autosamba
- luci-app-samba4
- luci-i18n-samba4-zh-cn
Configure Users
Install shadow-useradd
opkg updateopkg install shadow-useraddIf installation fails, try changing the repository (remember to back up).
Add a samba password for root:
smbpasswd -a rootCreate a new linux user sambashare and set home directory:
opkg updateopkg install shadow-useradd
useradd sambashare -g rootpasswd sambasharemkdir /home/sambasharechown sambashare /home/sambashare/
Add samba password for sambashare:
smbpasswd -a sambashareShare Directory
Configure directly in the OpenWrt panel (make sure not to disable NetBIOS, otherwise the Xiaomi camera cannot find the device)
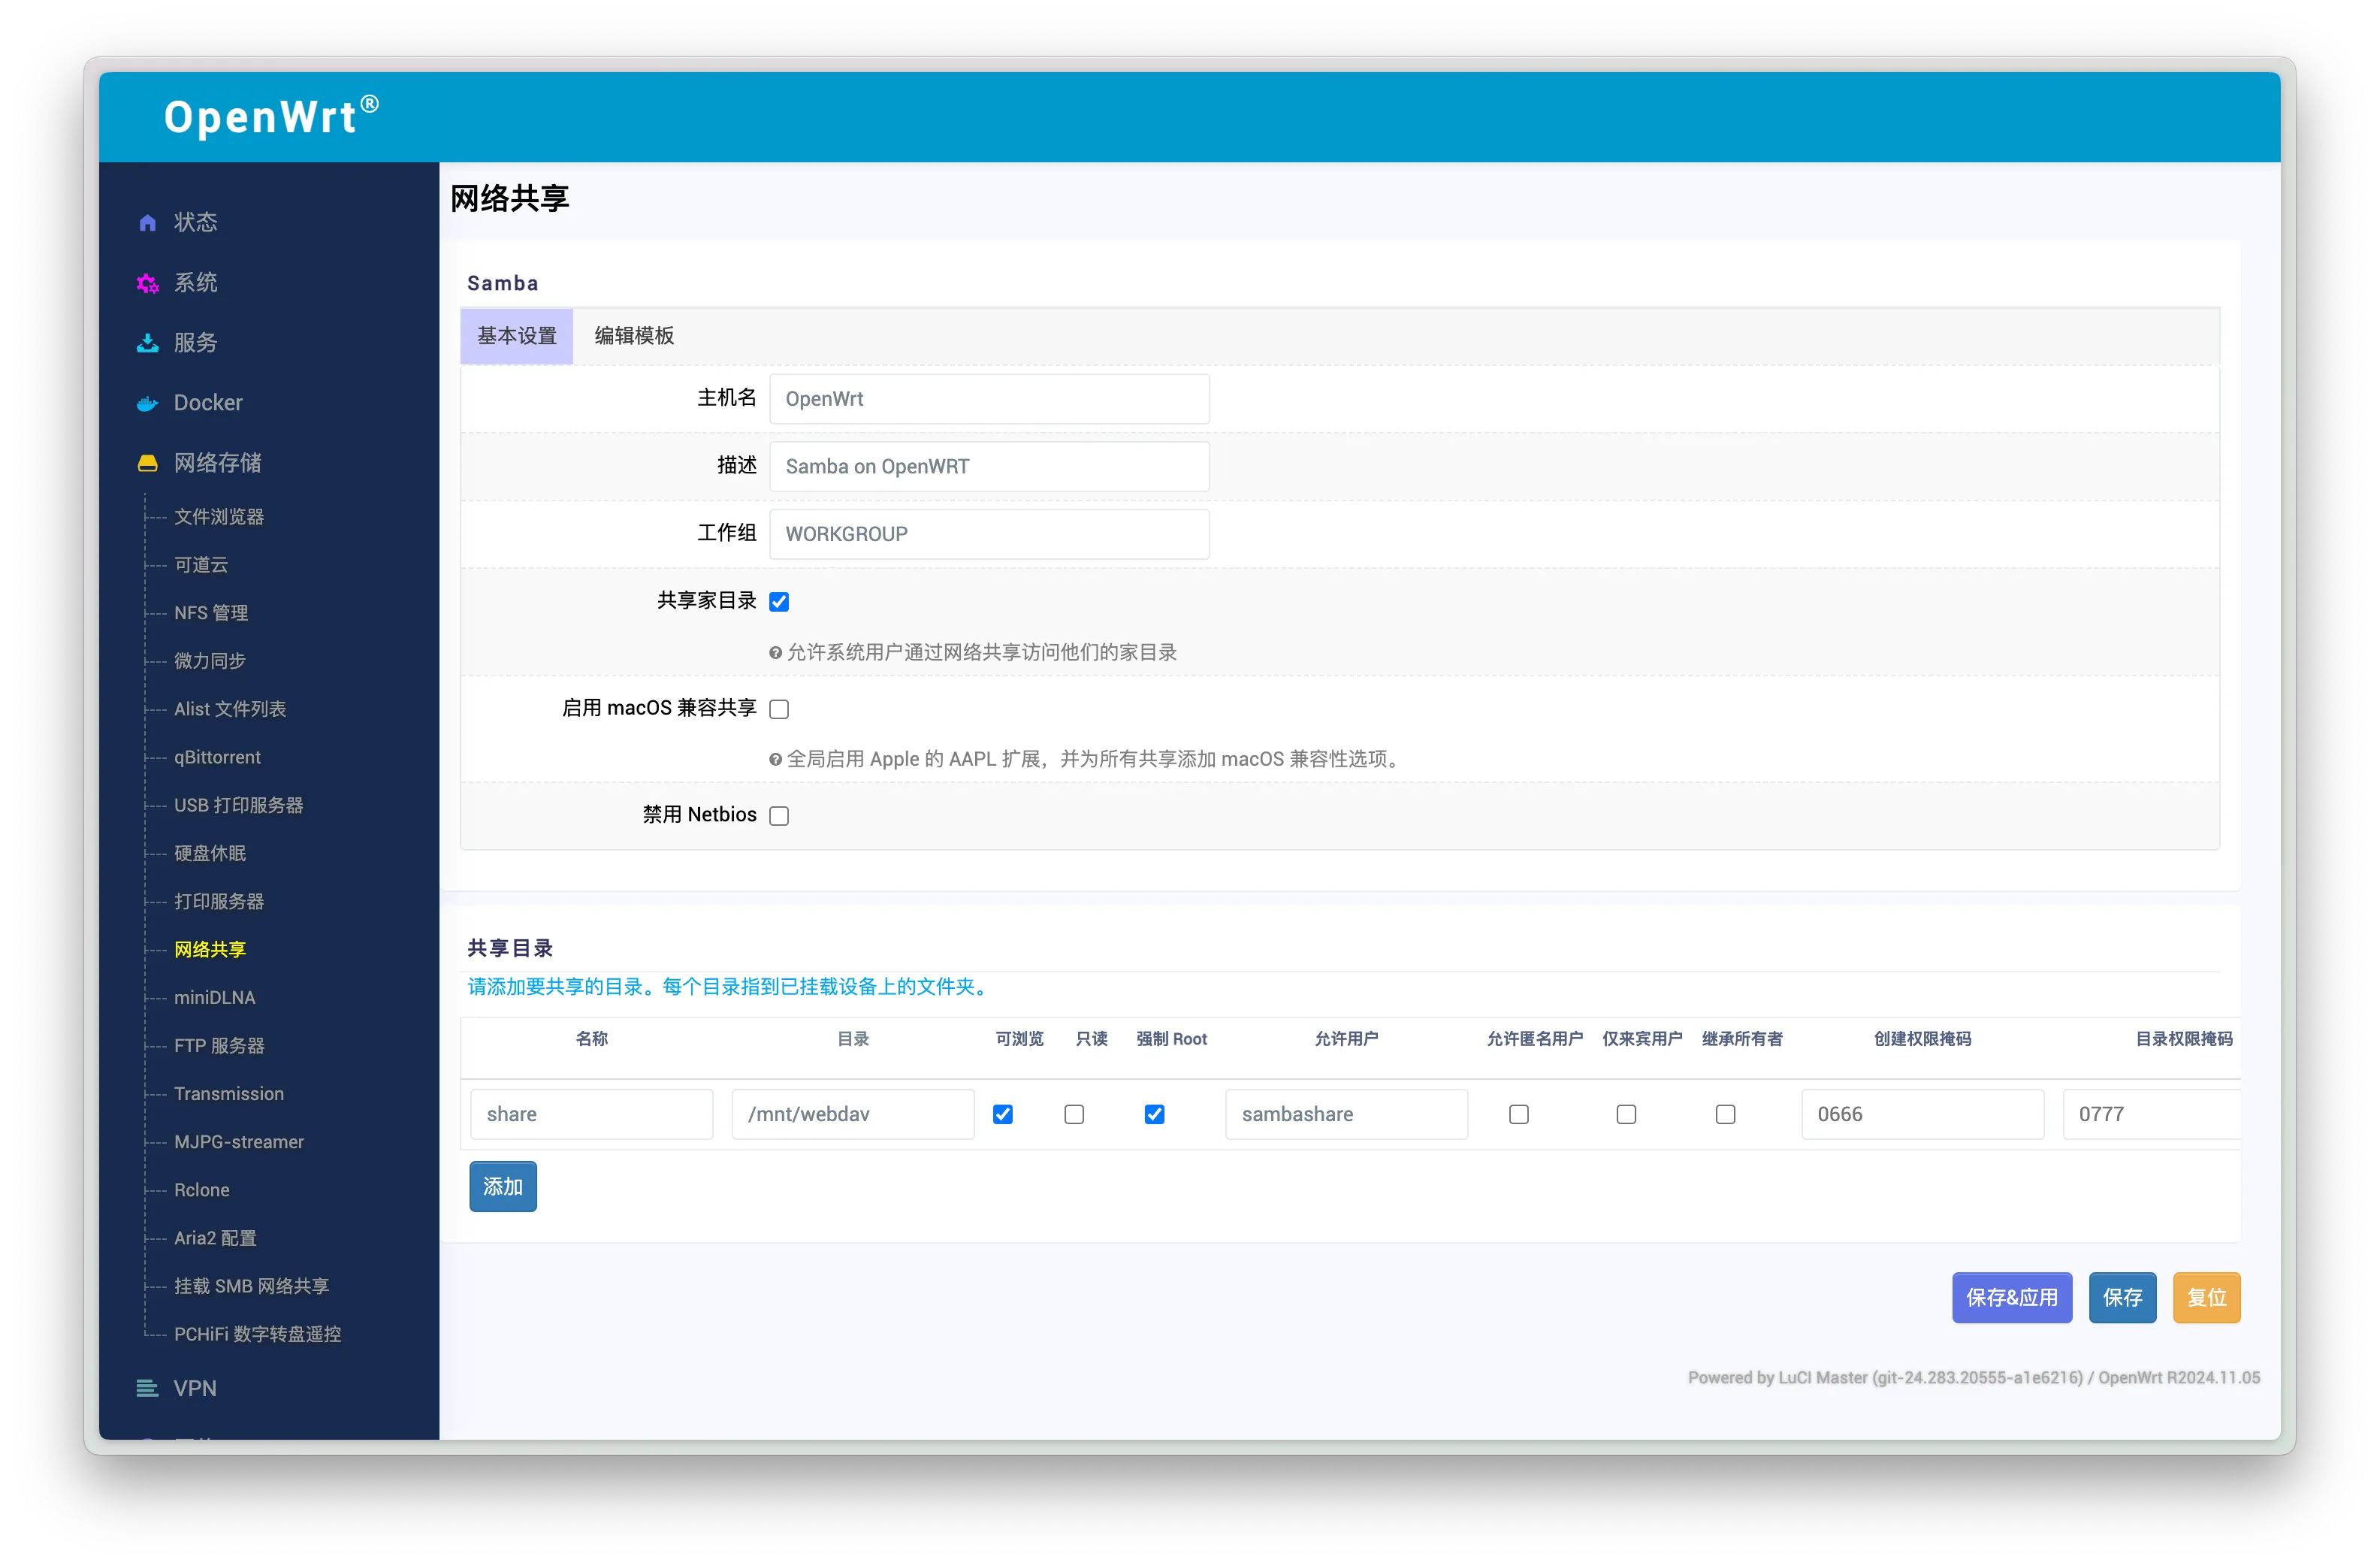
Check
Set restart and enable on boot
/etc/init.d/samba4 restart/etc/init.d/samba4 enableCheck status
/etc/init.d/samba4 statuslogread | grep smbnetstat -tuln | egrep '137|138|139|445'Test remote connection
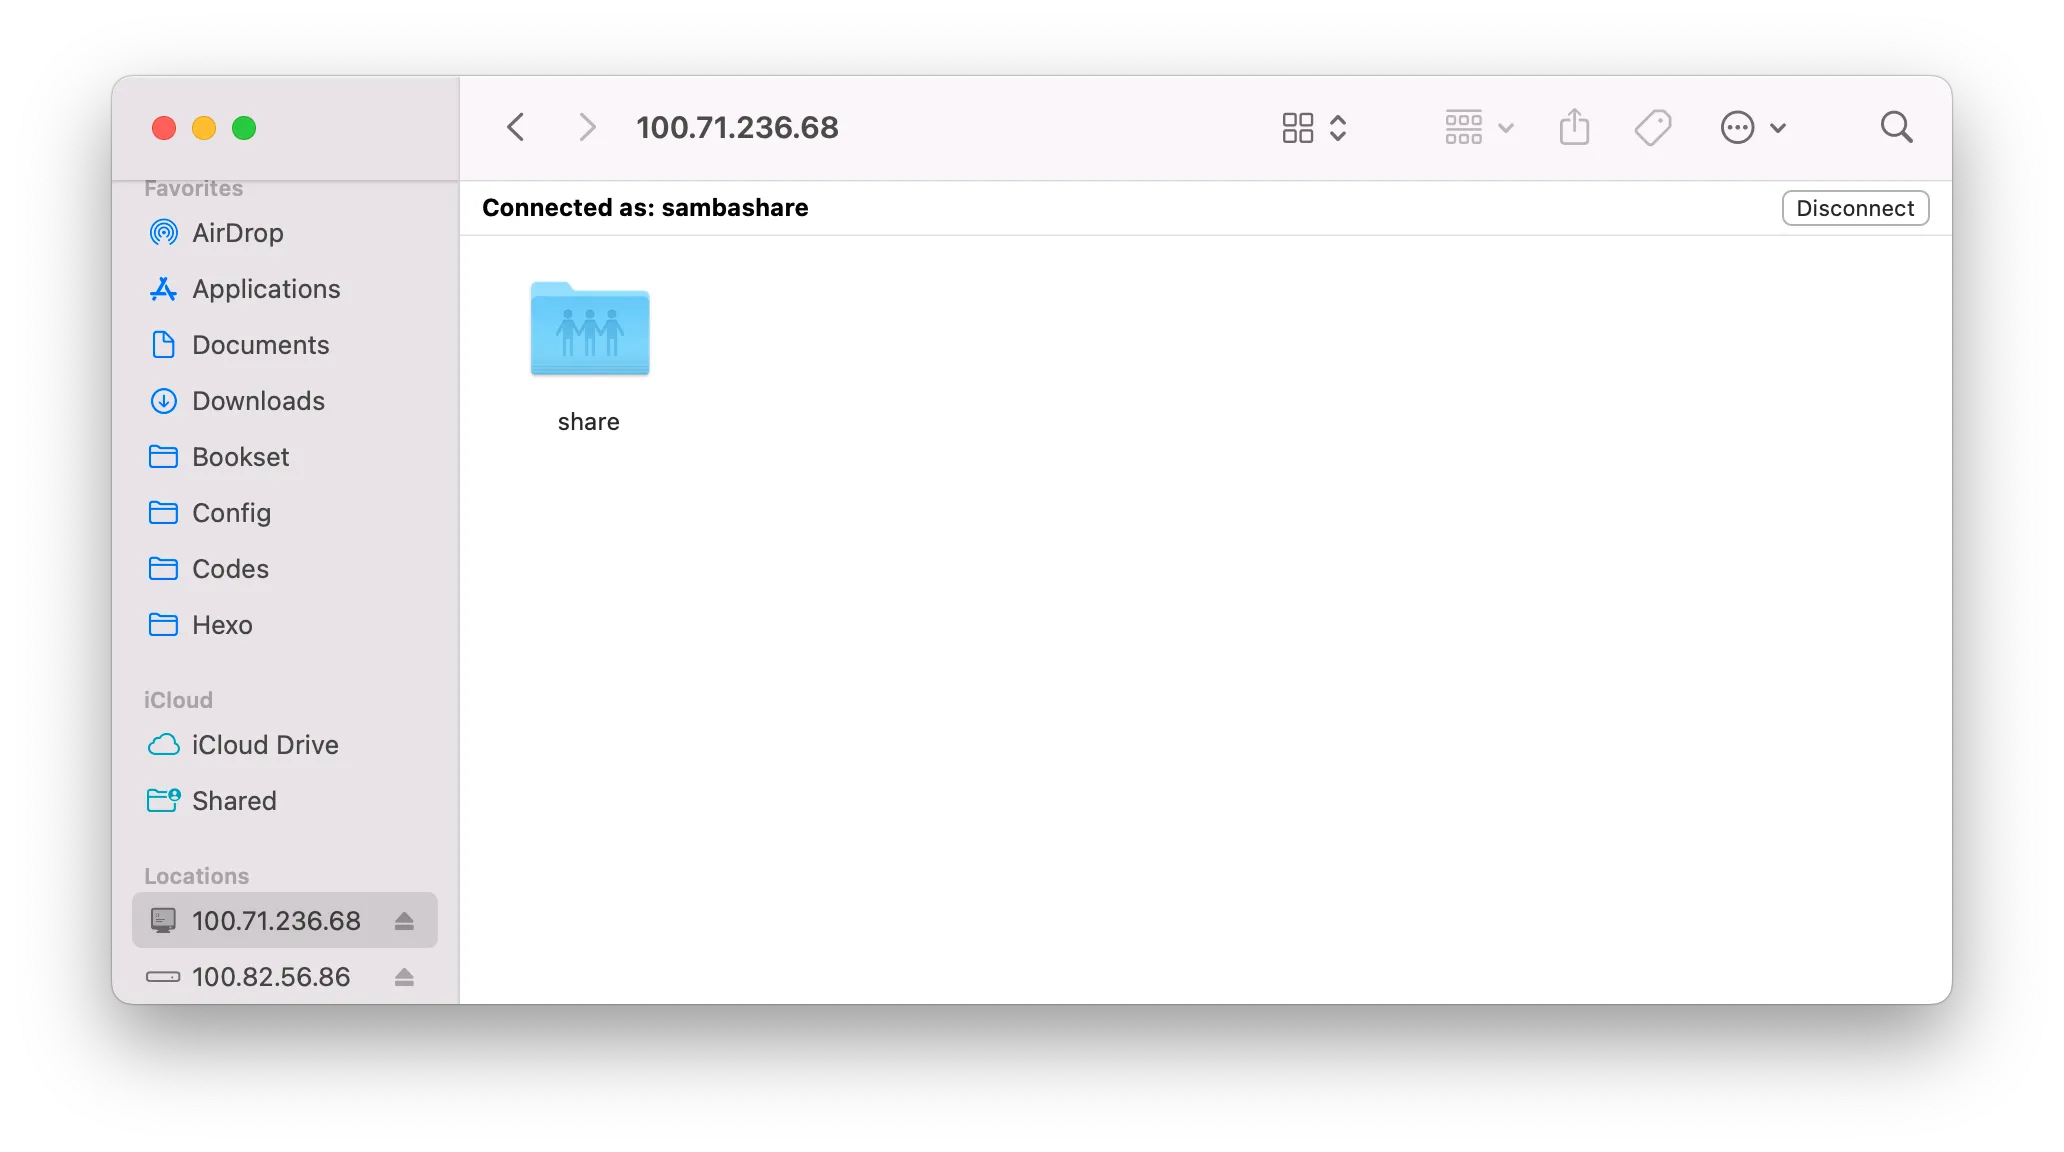
Test file read/write (drag a file in to test)
Xiaomi CW500 Camera Configuration
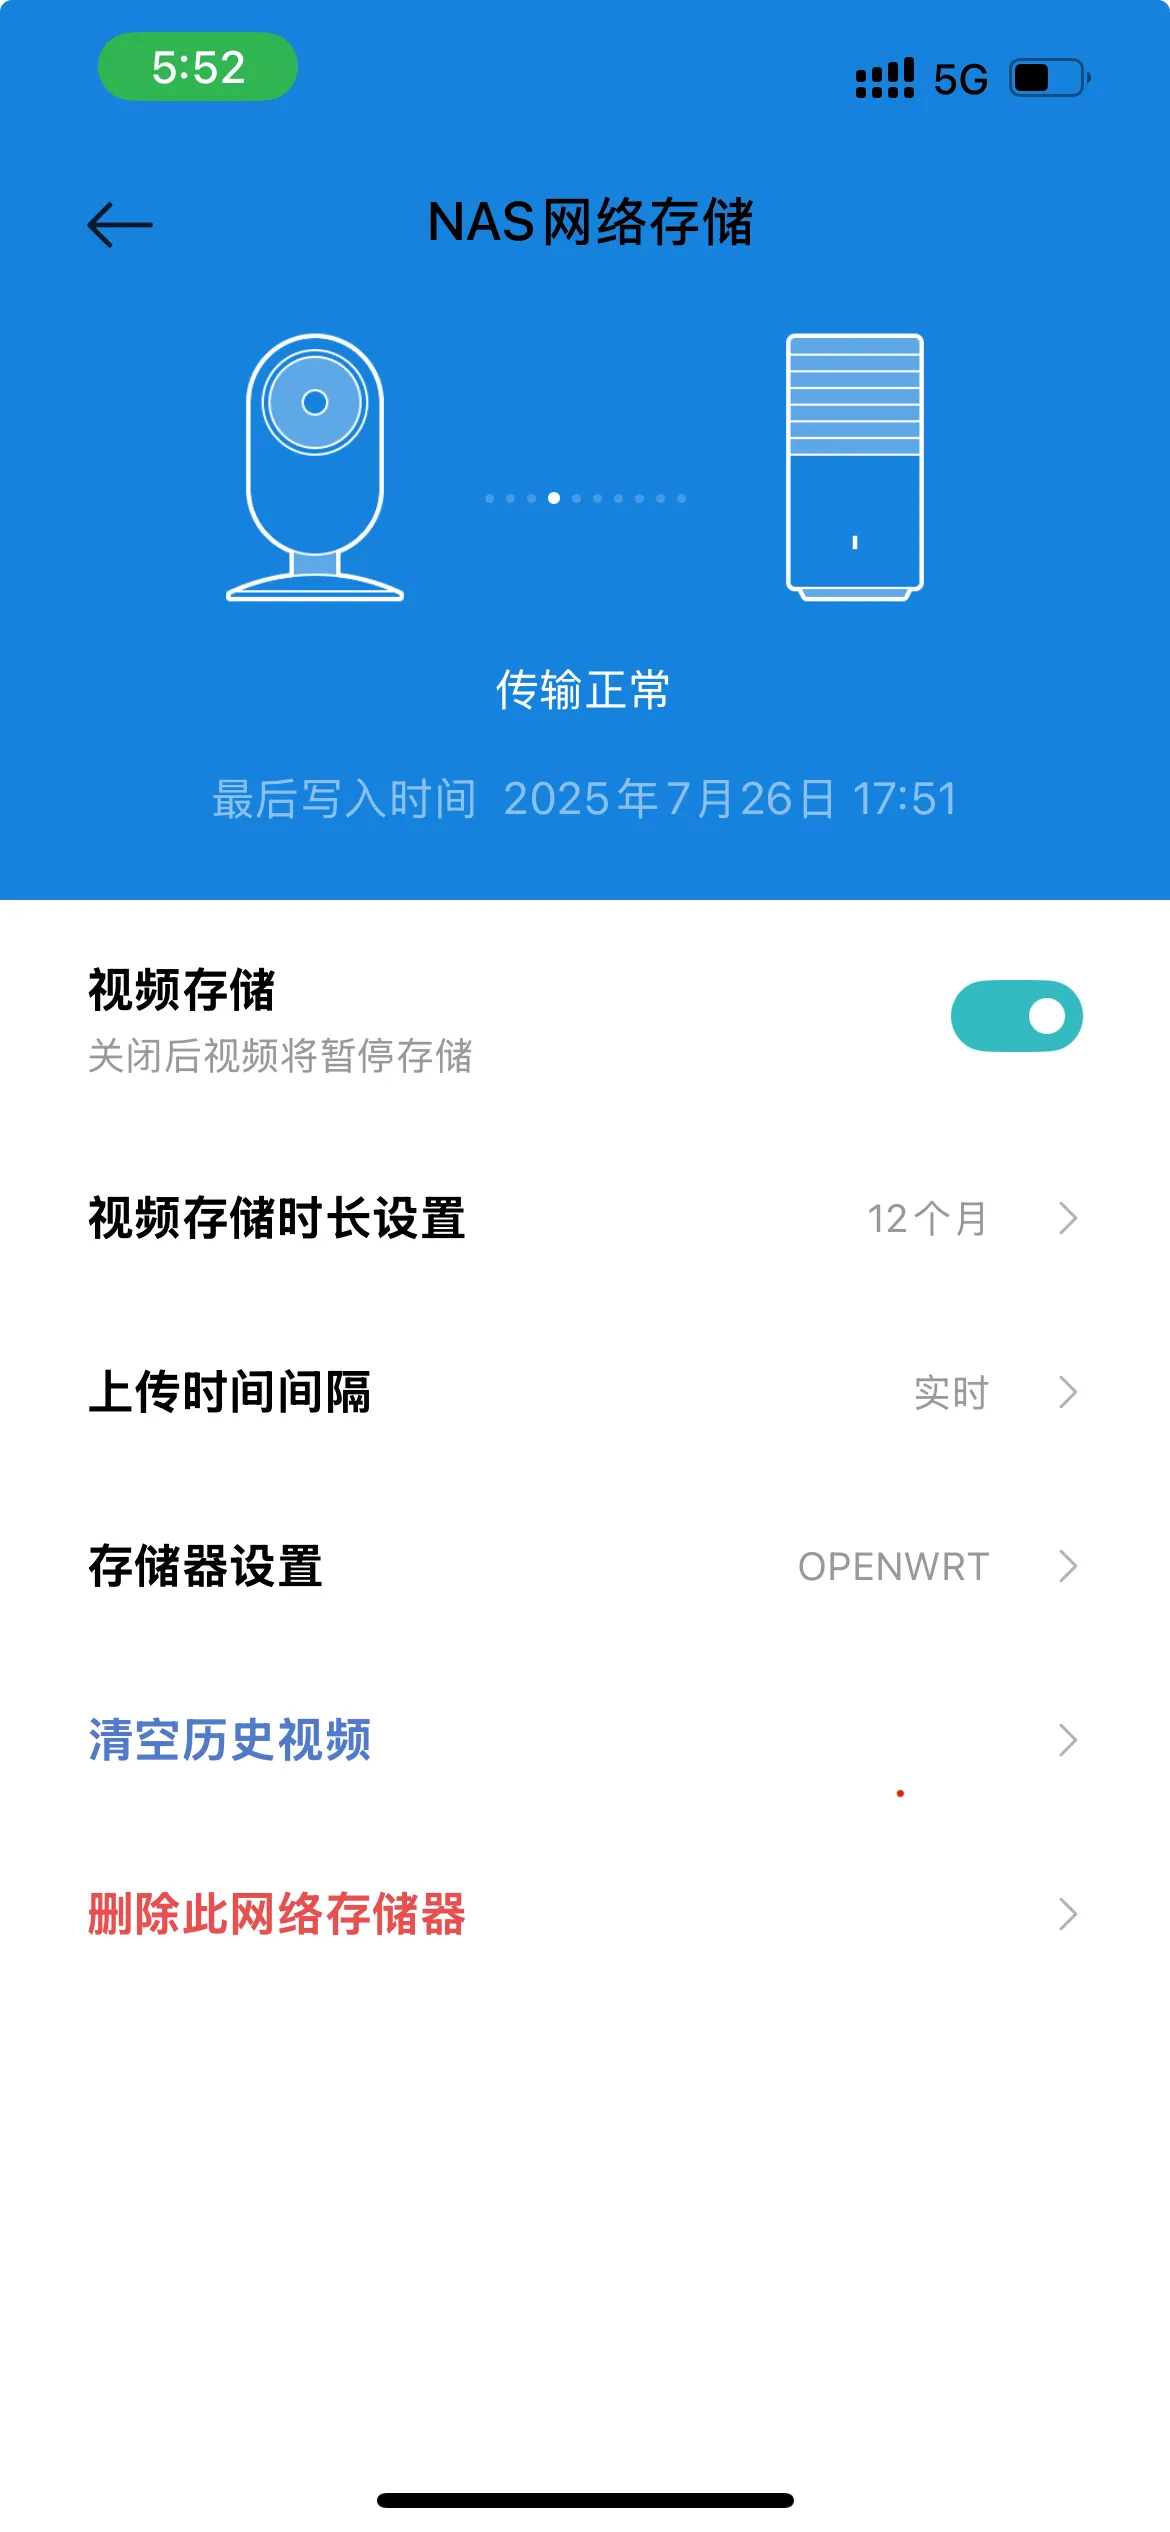
Enter the camera, go to: Settings -> Storage Settings -> NAS Storage
Simply add it
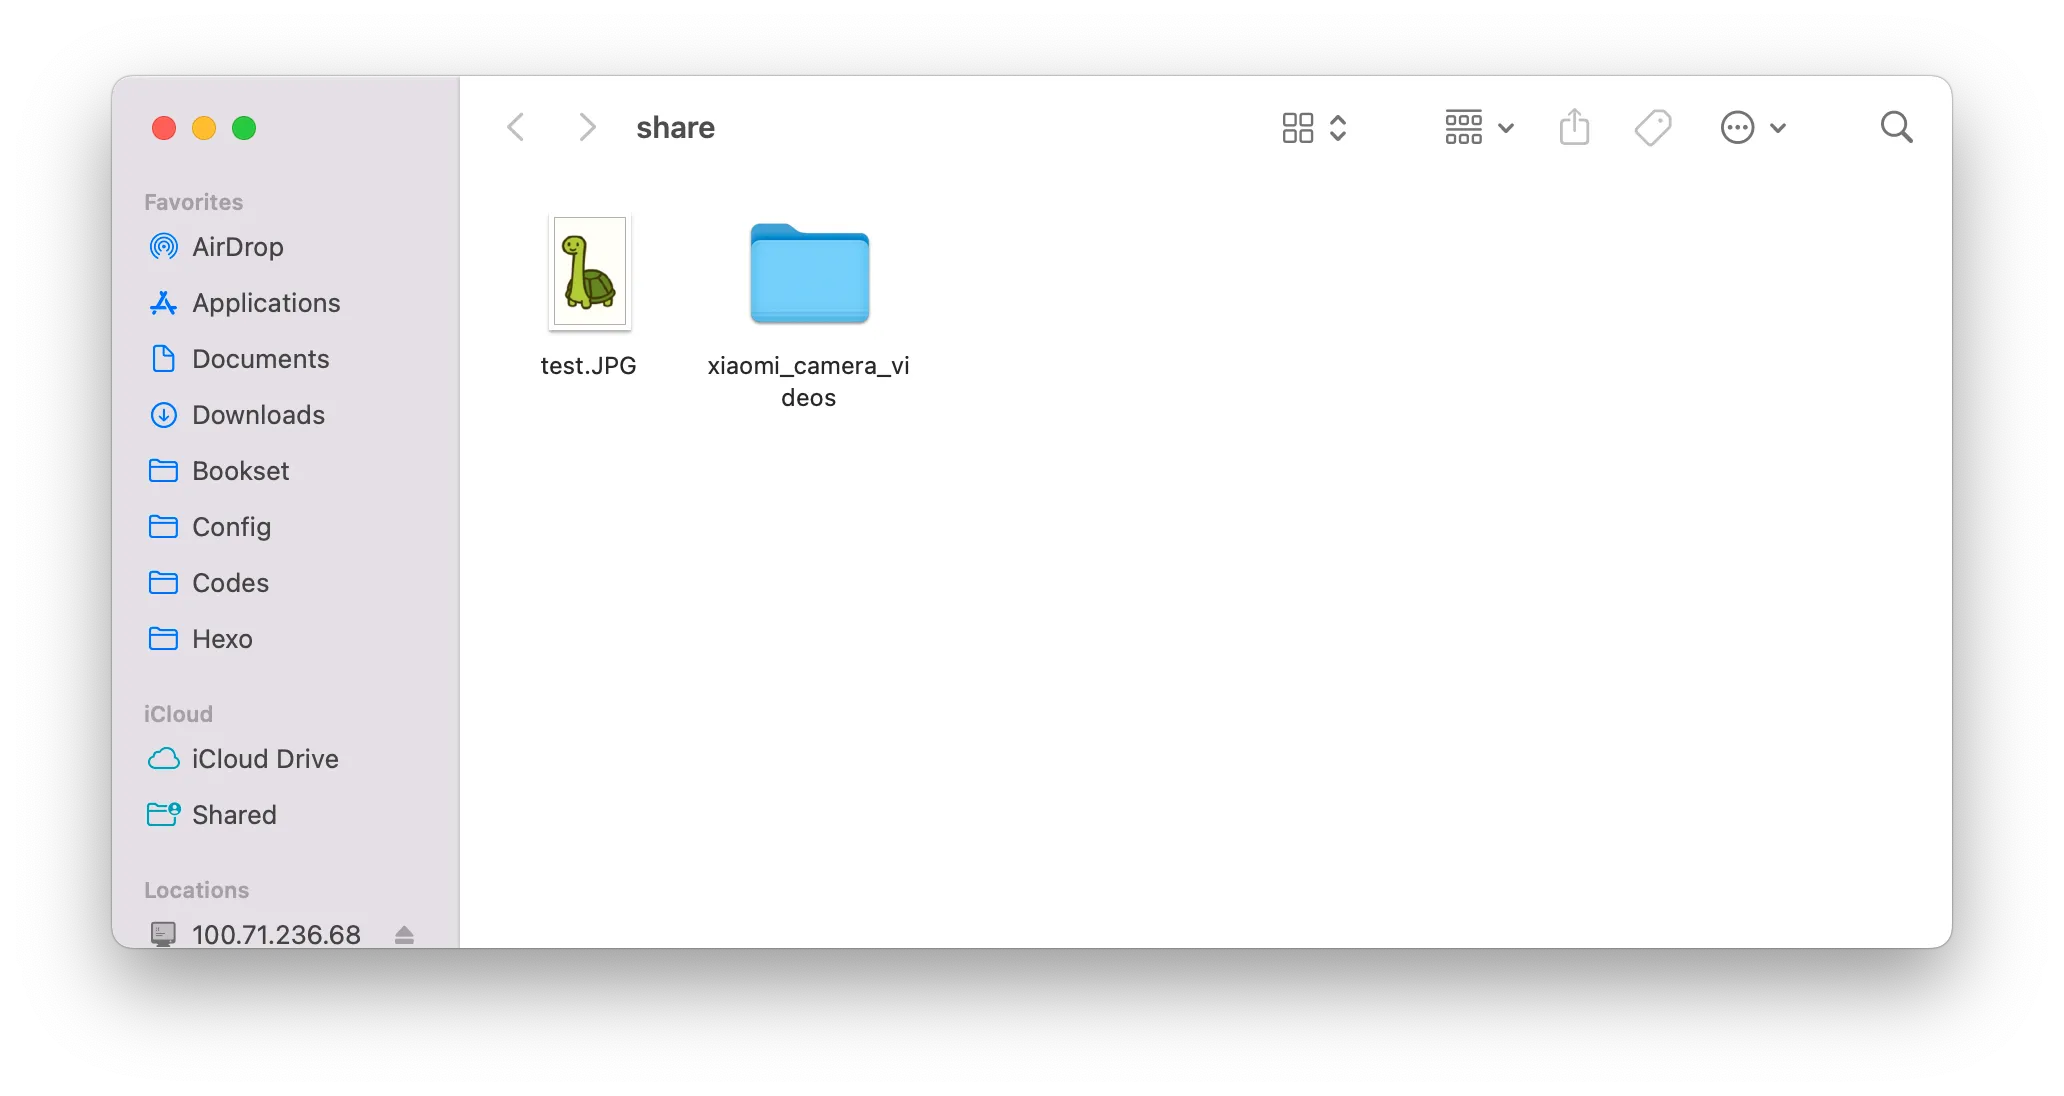
Check the mount point:
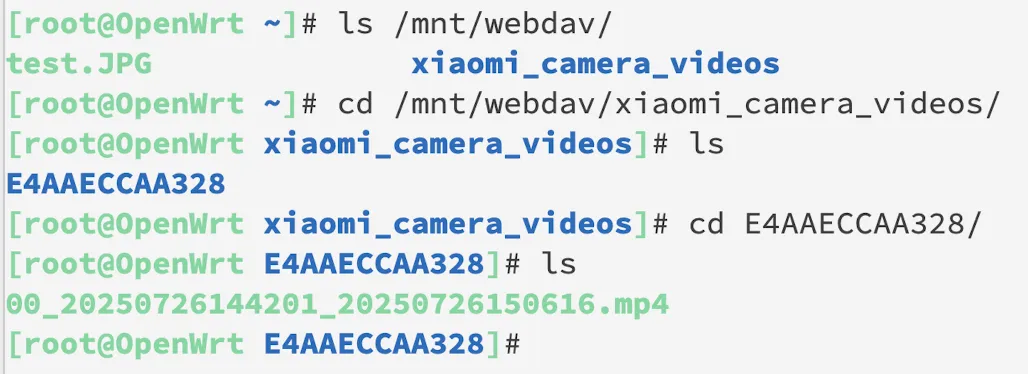
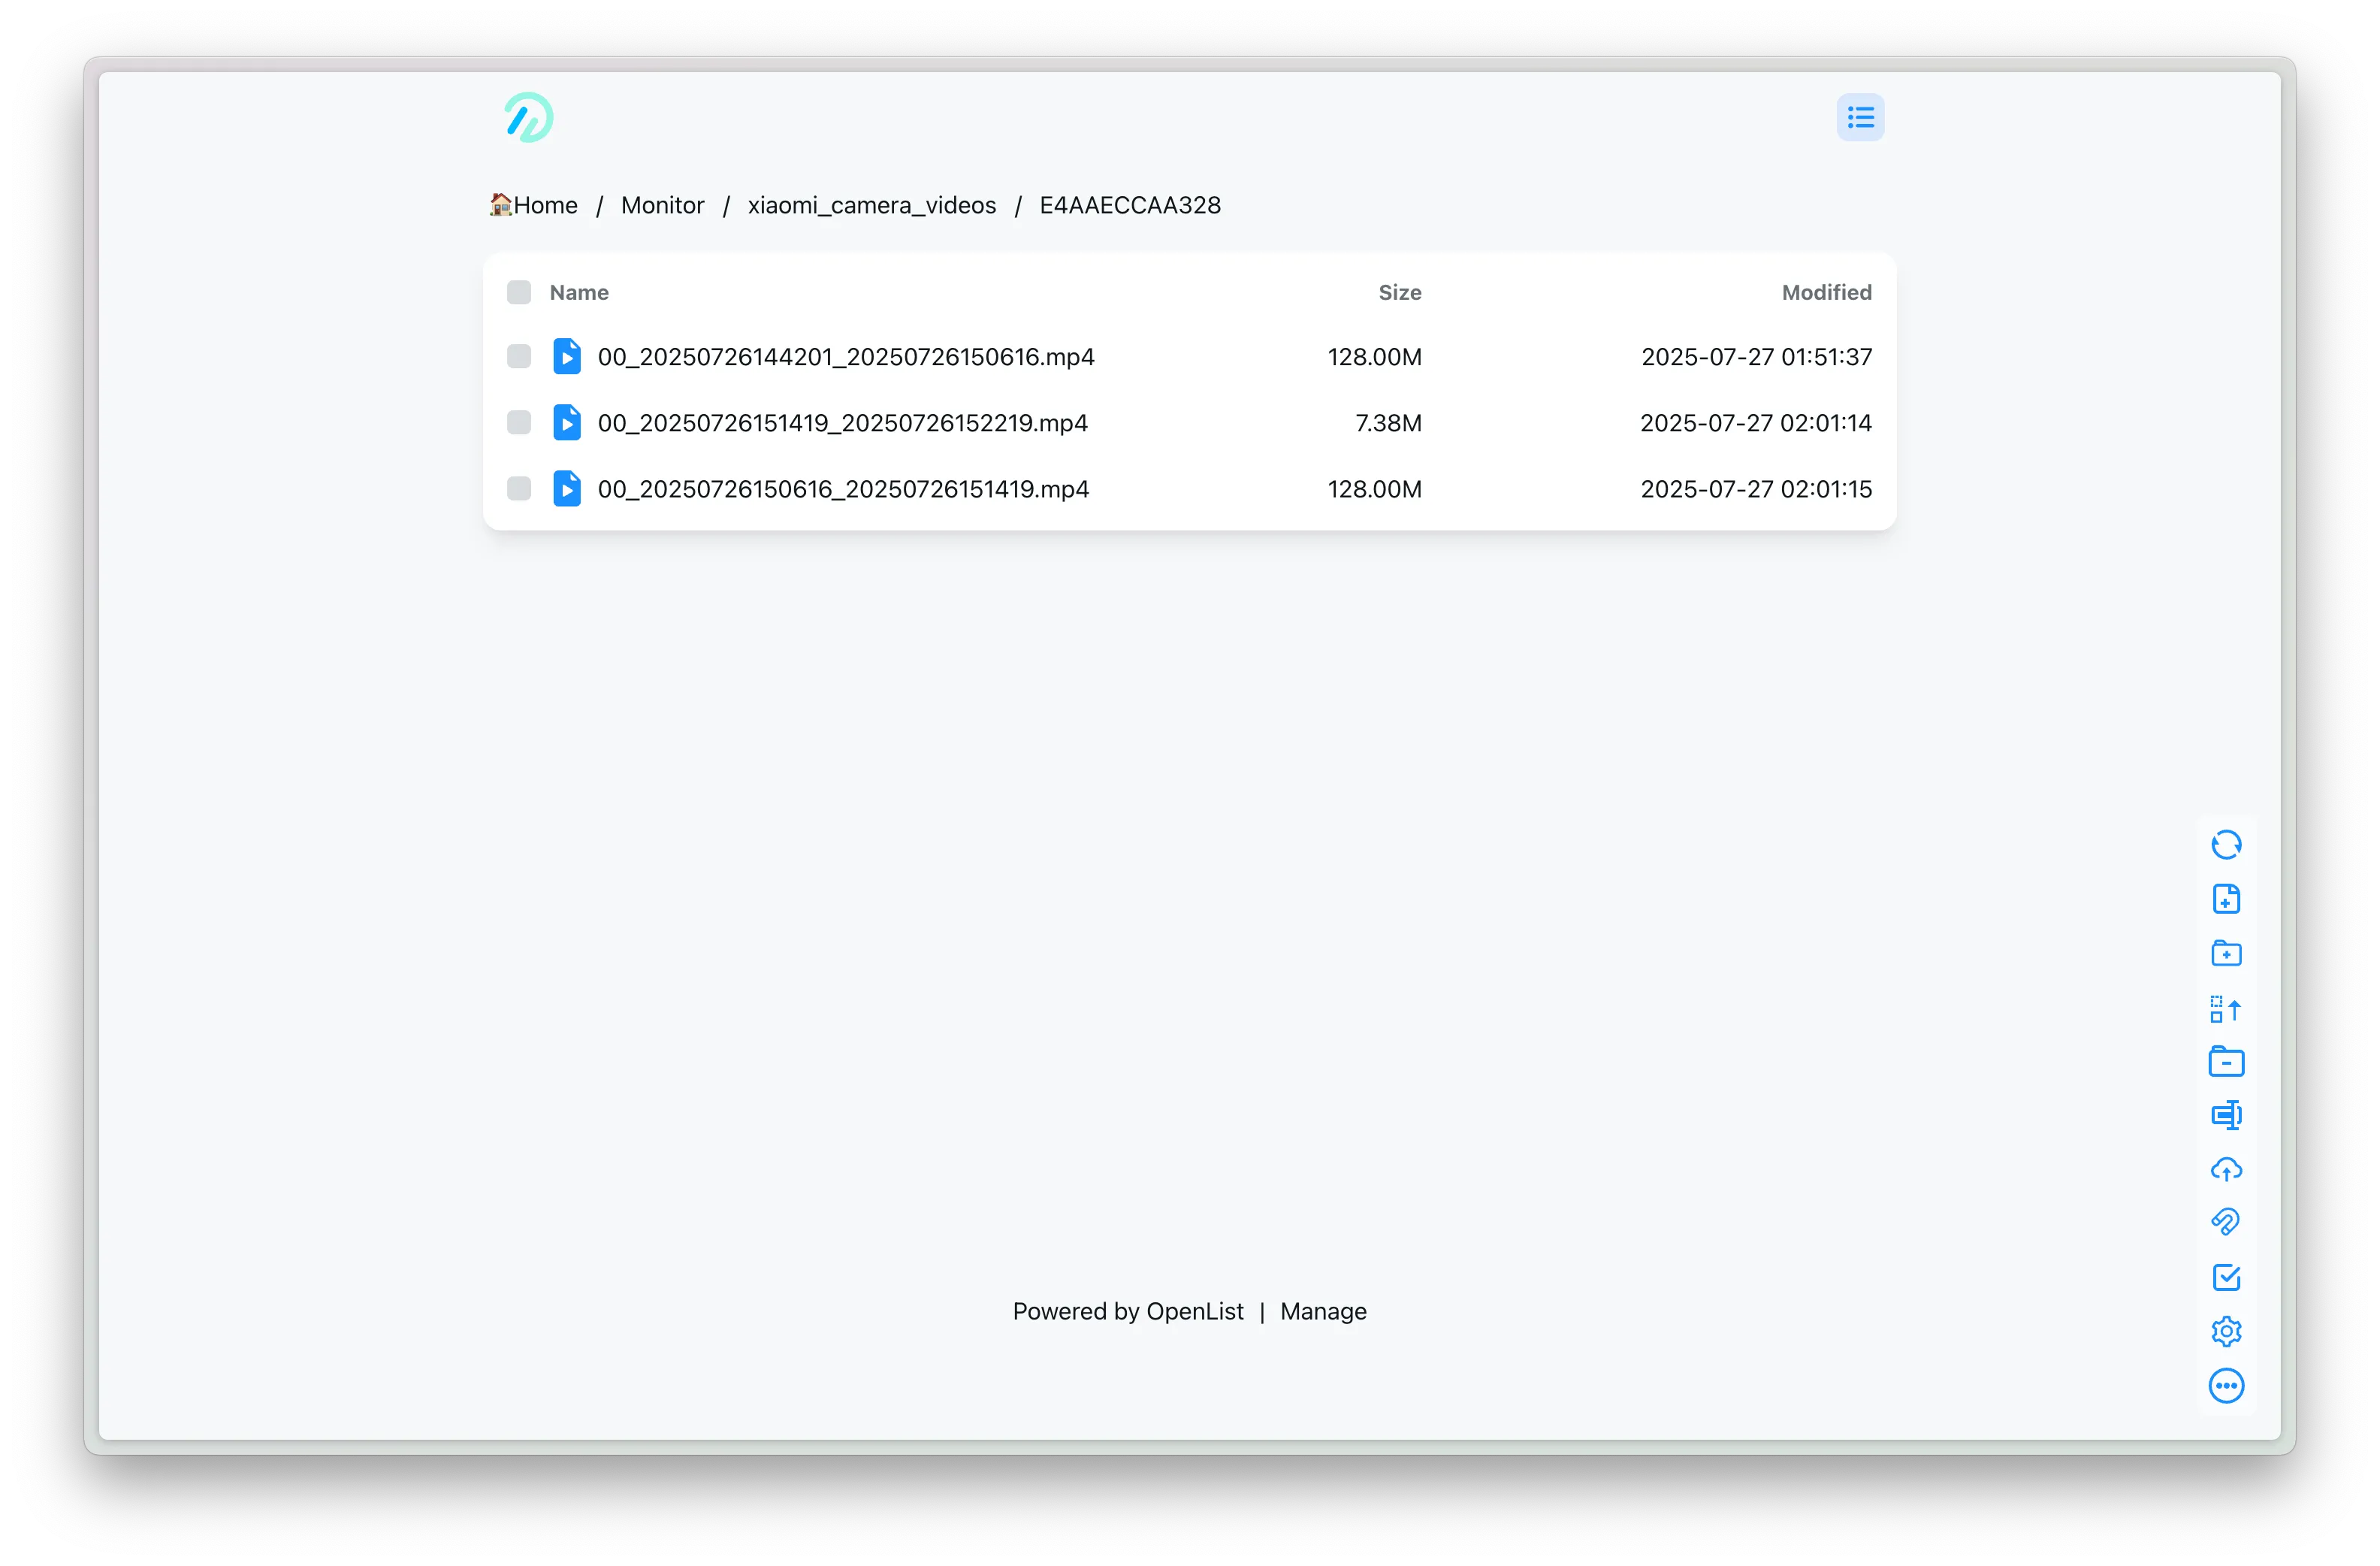
The files are correctly stored.
You can also see them on OpenList:
Issues Encountered
Q0: Why can’t the Xiaomi camera find the OpenWrt device?
A0: First check if they are on the same subnet, then check if Samba on OpenWrt has NetBIOS disabled (Must not be disabled)
Q1: Why can’t the Xiaomi camera write to the shared directory?
A1: Check the permission settings in the rclone mount parameters --dir-perms 0777, --file-perms 0777. Since the directory is mounted via rclone, chmod 777 does not apply; you need to configure permissions in the rclone mount parameters.
Q2: Why does it show no permissions?
A2: See Q1&A1
Supplement
If you want to access this internal “NAS” device from the public network, you can configure intranet penetration:
- Intranet penetration via Tailscale on OpenWrt
- Expose Socks5 port via Tailscale for proxy software
- Build a domain-free Tailscale DERP
Ref
Most complete rclone mount cloud drive to local (Alist chapter) solution
Setting up Samba share on OpenWRT